All posts by B T

Nimono Braising

Japanese Nimono Braising: Deep Umami Craft | Soil Dining
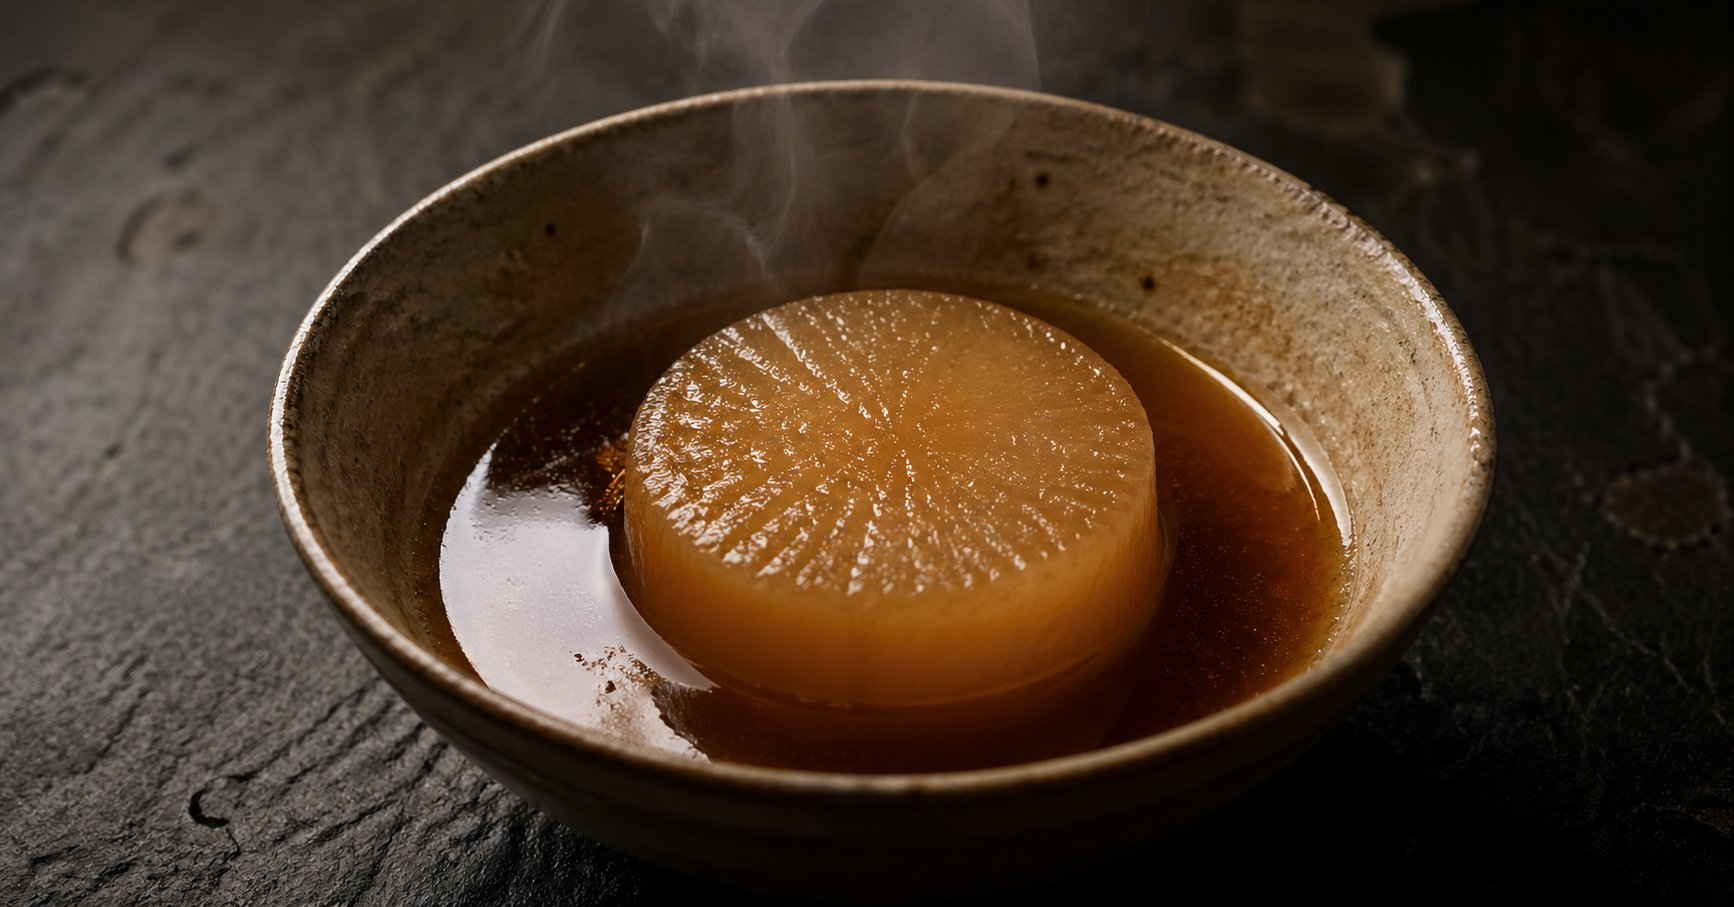
A single round daikon braised in dark amber dashi broth inside a Japanese ceramic bowl, delicate steam rising against a dark stone surface

Cooking Technique · Soil Dining

Japanese Nimono Braising:
Braise First, Grill Second

The quiet Japanese technique that builds umami from within — and why the broth is never just the broth

A single round of daikon sits in a ceramic bowl. The broth around it is the colour of old amber, barely trembling at the surface. There is no garnish. No theatrical finish. Just an ingredient that has been slowly, patiently transformed — saturated from within with the layered umami of dashi, the gentle sweetness of mirin, the clean depth of sake. This is nimono. This is restraint as mastery.

Key Takeaways

  • Nimono is Japanese simmered braising in seasoned dashi — the technique that builds umami depth from within rather than adding it on top
  • Ichiban dashi (first-draw dashi from kombu and katsuobushi) provides the cleanest, most layered umami base for braising
  • Cooling in the broth after cooking is not optional — it is the step that transfers the most flavour into the ingredient
  • Braise first, grill second: nimono followed by binchotan finishing separates internal texture from surface drama
  • The otoshibuta (drop lid) controls even heat distribution and broth penetration — a cartouche works as a home substitute

Why Nimono Is the Most Underrated Technique in the Professional Kitchen

In a culinary world that rewards spectacle — flaming pans, smoking cloche, tableside drama — nimono asks nothing of the audience. It happens quietly, over low heat, in a pot that barely moves. Yet the results sit at the top of Japanese cuisine's most revered preparations. A daikon braised correctly in dashi for two hours is one of the most flavourful things a kitchen can produce — its interior saturated with umami, its texture transformed from sharp and astringent to silky, yielding, and profound.

At Soil Dining, nimono braising is one of the core techniques bridging our Japanese and Mediterranean influences. The patient logic of braise-first is Japanese; the instinct to then finish over live fire, adding char and caramelisation to the silky braised interior, is a conversation between two traditions that understand patience and heat equally well.

Understanding nimono is understanding that depth of flavour is not added — it is built, slowly, from within. For anyone curious about Singapore private dining that takes technique seriously, this is where the quietest and most powerful work happens.

Nimono vs. Western Braising vs. Other Asian Braises: A Direct Comparison

StyleBraising LiquidFlavour ProfileTexture GoalTypical Ingredients
Nimono (Japanese)Dashi, mirin, sake, soyClean, layered umami, delicate sweetnessTender, shape retainedDaikon, taro, lotus root, tofu, fish
French braiseWine, stock, mirepoixRich, deep, reduced, complexFalling-tender, sauce-integratedBeef, lamb, duck, leeks
Chinese red braise (hong shao)Soy, Shaoxing wine, sugar, spiceBold, sweet-savoury, lacqueredGelatinous, sticky, richPork belly, eggs, tofu
Korean jjimSoy, gochujang, garlic, gingerSpicy, bold, deeply savouryTender, sauce-coatedGalbi, fish, potatoes
Mediterranean braiseOlive oil, tomato, wine, herbsRustic, acidic, herbaceousTender, sauce-integratedLamb, octopus, artichoke

Chef's Tip

Make ichiban dashi the day before you need it. Cold steep kombu in water overnight — 10g per litre — then remove the kombu and bring the water to 60°C. Add katsuobushi, hold at 60°C for 10 minutes, then strain without pressing. The result is cleaner, more delicate, and more nuanced than a hot steep — exactly the quality nimono deserves.

The Four Pillars of Nimono Technique

1. Dashi — The Foundation That Cannot Be Faked

Every nimono begins with dashi, and the quality of the dashi determines the ceiling of the dish. Ichiban dashi — first-draw dashi from kombu and katsuobushi — provides two distinct umami compounds: glutamate from the kombu and inosinate from the bonito. These two compounds in combination create a synergistic umami effect significantly more powerful than either alone — a phenomenon documented in food science as umami synergy.

The dashi used for nimono must be clear, clean, and light. A murky or overly reduced dashi produces a braised ingredient that tastes heavy rather than refined. The Japanese term umami no kireme — the clean edge of umami — describes the quality that separates dashi-braised food from anything made with Western stock. It is a flavour with a beginning and an end, not one that coats and lingers.

2. Seasoning Ratio — The Nimono Formula

The classic nimono seasoning ratio builds on the dashi base with three additional elements: mirin for natural sweetness and gloss, sake for aromatic complexity and to remove any rawness from the ingredient, and soy sauce — usually light soy (usukuchi) — for salinity and depth without heavy colour. The ratio is not fixed across all nimono — it shifts based on ingredient and season.

A winter daikon nimono uses more mirin for sweetness, mirroring the root's natural sugar content in cold months. A summer eggplant nimono uses less, allowing the broth to be lighter and more refreshing. The ratio is a response to the ingredient, not a formula imposed upon it. This responsiveness is the core philosophy of kaiseki cooking, within which nimono sits as a foundational preparation.

3. The Otoshibuta — Why the Drop Lid Changes Everything

The otoshibuta — a wooden drop lid placed directly on top of ingredients inside the pot — is one of the most elegant tools in Japanese cooking. Placed on the surface of simmering liquid, it keeps ingredients fully submerged without requiring excess broth, ensures even heat distribution across every surface, reduces evaporation while allowing gentle circulation, and prevents delicate ingredients from breaking up through turbulence.

The practical result: more flavour penetration with less liquid, more even cooking, and a more precise control of the braise than a standard lid allows. A cartouche — a circle of parchment paper cut to the diameter of the pot — achieves the same effect and is the standard substitute in Western professional kitchens. Never braise nimono-style without one.

4. Rest in the Broth — The Most Important Step

Once the ingredient has reached the correct internal texture, most cooks remove it from the heat and plate immediately. This is the single most common mistake in nimono. The correct approach is to turn off the heat and leave the ingredient in the broth as it cools — for a minimum of 30 minutes, ideally 2–4 hours or overnight.

As the temperature drops, the broth contracts slightly and is drawn back into the ingredient through osmosis. The flavour penetration during this cooling phase is significantly greater than during the active cooking. A daikon that rests overnight in its nimono broth tastes three times more flavoured than one plated hot. This is not poetic exaggeration — it is the measurable result of patient technique.

Chef's Tip

For the braise-then-grill technique at Soil: braise daikon or turnip in nimono broth until completely tender, then cool in the broth overnight. Before service, drain and pat dry, brush with a thin layer of white miso thinned with mirin, and finish over binchotan for 90 seconds per side. The miso caramelises into a lacquered, slightly charred crust over the silky, umami-saturated interior. Two techniques, one completely unified dish.

"Nimono does not add flavour to an ingredient. It convinces the ingredient to become the flavour — slowly, from the inside out."

Braising Traditions Across Two Culinary Worlds

Japan — Kaiseki and the Philosophy of Restraint

Within kaiseki — Japan's most refined multi-course culinary tradition — the nimono course is called nimono-wan: a lidded lacquer bowl containing a single braised ingredient in clear dashi broth. It arrives midway through the meal, a moment of quiet after the visual spectacle of earlier courses. The Japanese understanding of nimono is inseparable from the concept of ma — meaningful negative space. The simplicity of a single ingredient in clear broth is not poverty of imagination. It is the highest expression of confidence in technique.

Mediterranean — Slow Fire and Patient Transformation

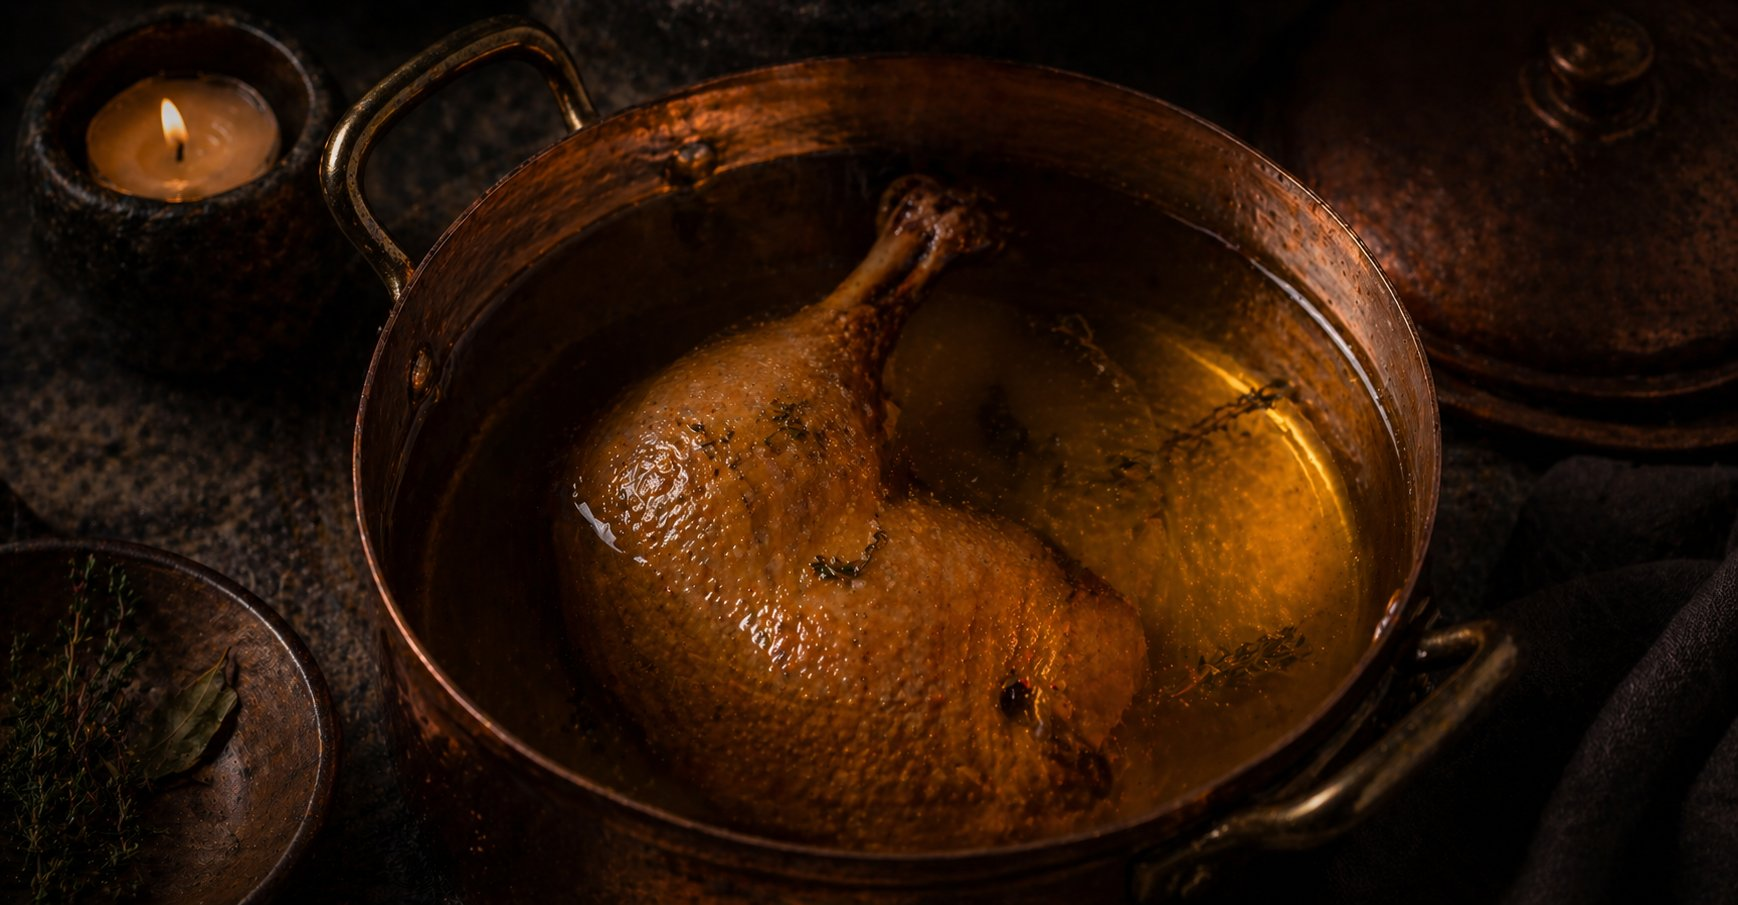
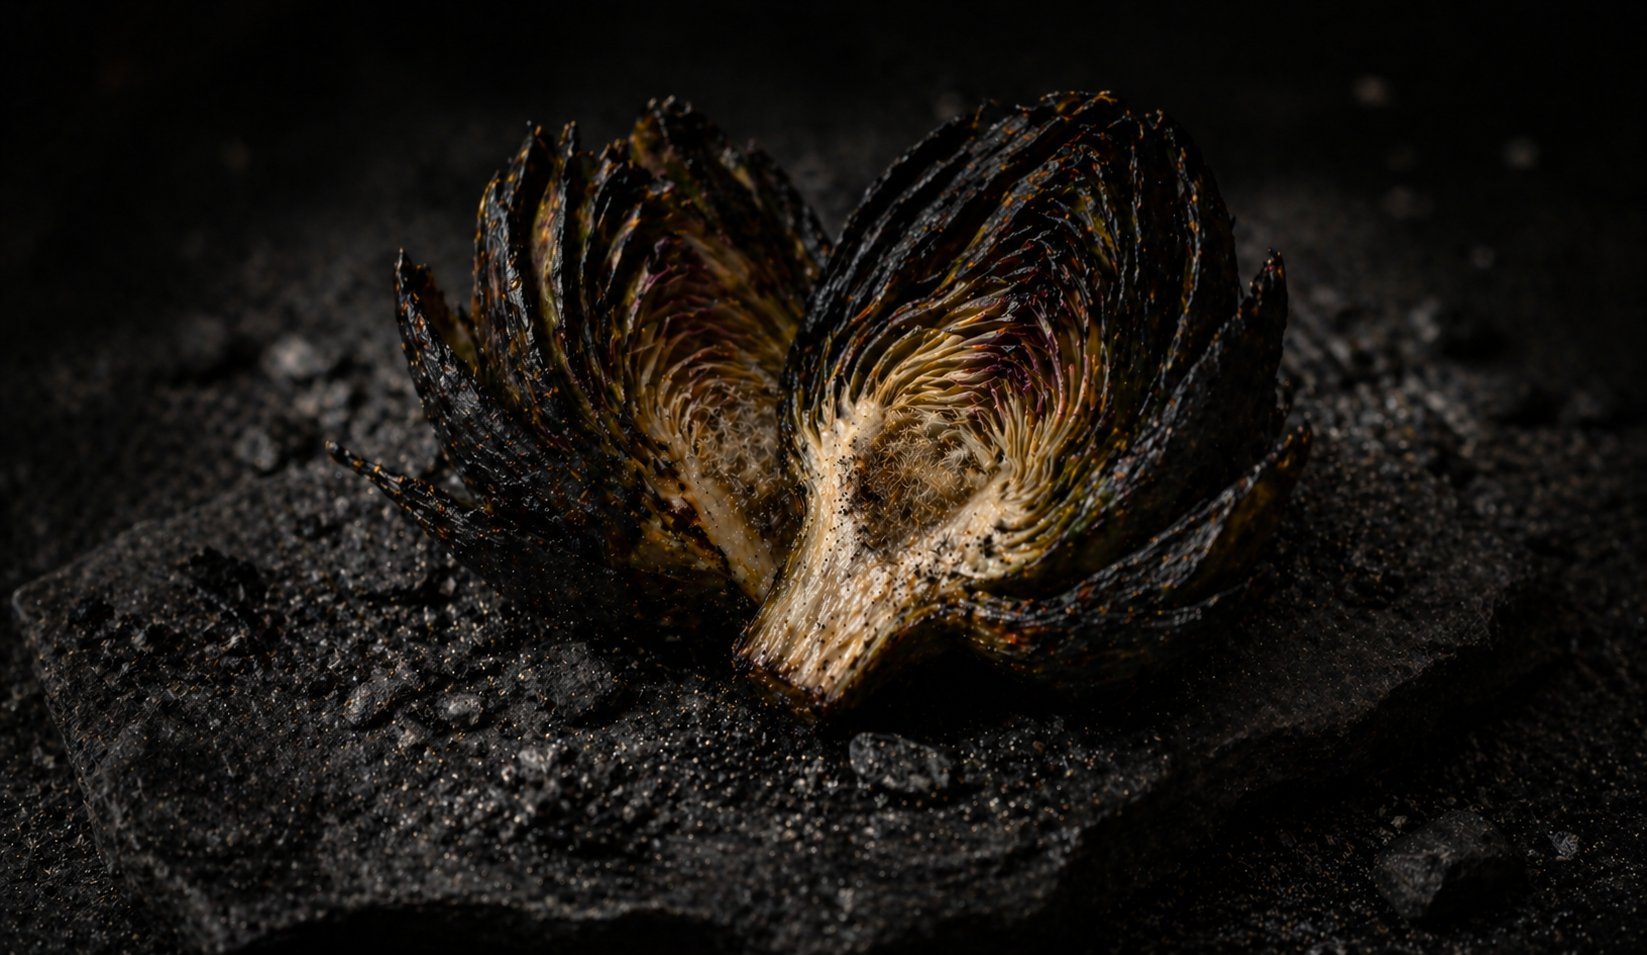
Mediterranean braising traditions share the same patient logic expressed in an entirely different register. Provençal daube — beef braised for hours in wine, olives, and herbs — and Sicilian caponata — eggplant braised in agrodolce — both operate on the principle that time and gentle heat transform rather than cook. At Soil, Mediterranean braising ingredients — artichoke, fennel, octopus — are approached with nimono's restraint: less liquid, more patience, cooling in the broth before service. The technique crosses cultures cleanly because the physics are identical.

Southeast Asia — Braise as Flavour Architecture

Southeast Asian braised preparations — Singaporean lor bak, Nyonya babi pongteh, Vietnamese thịt kho tàu — use the braise as a bold, assertive flavour architecture rather than a subtle background. The soy-sugar-spice braising liquids are meant to penetrate and coat simultaneously, creating dishes where the broth is as important as the ingredient itself. At Soil, this directness informs how we think about glazing braised elements at the end of service — the braising liquid reduced and brushed back onto the ingredient as a glaze, concentrating what the broth spent hours building.

Chef's Tip

Never discard nimono braising liquid. After the ingredient is removed, strain and refrigerate the broth. It carries significant umami depth and can be used as: a dipping sauce for cold tofu, a base for a second round of braising a different vegetable, a seasoning liquid for rice, or reduced further to a glaze for grilled proteins. A great braising broth is itself an ingredient.

Common Mistakes in Nimono Braising — and How to Fix Them

Mistake 1: Boiling instead of simmering

A rolling boil breaks delicate ingredients, clouds the broth, and drives moisture out of the ingredient rather than allowing the broth to penetrate inward. Nimono must simmer at 85–90°C — surface barely trembling, no turbulence.

Fix: Use a thermometer. 85°C is the correct temperature. If bubbles are breaking the surface vigorously, reduce the heat immediately.

Mistake 2: Skipping the pre-blanch for daikon and root vegetables

Raw daikon and taro contain harsh, astringent compounds that survive gentle simmering. Without pre-blanching in plain water, these flavours transfer into the dashi broth and produce a bitter, murky result.

Fix: Blanch root vegetables in plain unsalted water for 10–15 minutes before adding to the nimono broth. Rinse, then braise. The dashi remains clean and the vegetable receives it without resistance.

Mistake 3: Using too much soy sauce

Heavy soy seasoning turns nimono into something closer to Chinese red braise — dark, assertive, one-dimensional. Nimono's power comes from layered restraint, not bold seasoning.

Fix: Use light soy (usukuchi) at no more than 1 tbsp per 600ml dashi. Taste after 30 minutes of simmering — the broth should taste pleasantly savoury, not salty.

Mistake 4: Plating hot without resting in broth

The cooling phase is when the most flavour transfers into the ingredient. Plating immediately after cooking wastes the majority of the technique's potential.

Fix: Turn off the heat. Leave the ingredient in the broth for a minimum of 30 minutes. Overnight refrigeration in the broth produces the best results of all.

Mistake 5: Braising without an otoshibuta or cartouche

Without a drop lid, the top surface of the ingredient cooks in air rather than broth, producing uneven seasoning and texture — the bottom absorbs flavour while the top remains bland.

Fix: Cut a circle of parchment paper to the diameter of the pot and lay it directly on the surface of the simmering liquid and ingredients. Press gently to ensure contact with the broth.

Mistake 6: Using second-draw dashi (niban dashi) for nimono

Niban dashi — made by re-steeping the kombu and katsuobushi used for ichiban dashi — is earthier, more bitter, and less clean. It produces a nimono that tastes murky rather than refined.

Fix: Always use ichiban dashi for nimono. Reserve niban dashi for miso soup bases and heartier preparations where its deeper, less delicate character is appropriate.

Quick Reference: Nimono Braising Guide

IngredientPre-treatmentBraise TimeRest TimeBest Finish
Daikon (3cm rounds)Blanch 15 min plain water60–90 min at 85°COvernight in brothMiso glaze, binchotan finish
TaroPeel, blanch 10 min40–50 min at 85°C2–4 hours in brothServe in broth, garnish with yuzu
Lotus rootSlice, soak in vinegar water25–35 min at 85°C1–2 hours in brothServe in broth or pan-crisp briefly
Firm tofuPress, cut to size20–25 min at 85°C30 min in brothServe in broth, garnish with ginger
Chicken thigh (bone-in)Blanch briefly in boiling water45–55 min at 85°C30 min in brothGrill skin side over binchotan
Fennel (halved)Trim, no pre-cook needed35–45 min at 85°C1 hour in brothChar cut side in cast iron
Burdock root (gobo)Scrub, soak in water 10 min30–40 min at 85°C2 hours in brothServe in broth with sesame

Frequently Asked Questions

What is nimono in Japanese cooking?

Nimono is a category of Japanese simmered or braised dishes cooked in seasoned dashi broth. Ingredients are gently cooked in a broth of dashi, mirin, sake, and soy sauce until they absorb the liquid's umami depth while retaining their natural texture and shape. It is one of the foundational techniques of kaiseki cuisine.

What is dashi and why is it used in braising?

Dashi is a Japanese stock made by steeping kombu and katsuobushi in hot water. It provides a clean, layered umami base — glutamate from the kombu, inosinate from the bonito — that penetrates ingredients during the braise without the heaviness of meat-based Western stocks. The two umami compounds combine synergistically for extraordinary depth.

What vegetables work best for nimono?

Root vegetables with dense texture — daikon, taro, lotus root, carrot, burdock — absorb dashi broth most effectively and hold shape through long simmering. Tofu and konnyaku are also classic nimono ingredients. Delicate vegetables are better added as garnishes at the end rather than braised through.

What is the difference between nimono and Western braising?

Western braising uses rich, heavy braising liquids — stock, wine, tomato — that reduce into thick sauces coating the ingredient. Nimono uses light, clear dashi broth where the ingredient's own flavour remains the focus. The broth is a vehicle for umami absorption, not a sauce poured over at the end.

Can nimono be combined with grilling?

Yes — and this combination sits at the heart of Soil's approach. Braising first saturates the ingredient with umami depth and ensures silky, even texture throughout. A brief binchotan finish then creates caramelised surface and smokiness that contrasts with the interior. The two techniques answer different questions — and together they answer everything.

How do you make a simple nimono dashi broth?

Combine 600ml ichiban dashi with 3 tbsp mirin, 2 tbsp sake, and 1.5 tbsp light soy sauce. Bring to a simmer, add prepared vegetables, cover with an otoshibuta or parchment cartouche, and simmer gently at 85–90°C until completely tender. Cool in the broth for maximum flavour penetration.

What is an otoshibuta and why is it used?

An otoshibuta is a drop lid placed directly on top of simmering ingredients rather than on the pot rim. It keeps ingredients submerged in broth, ensures even heat across every surface, and reduces evaporation while allowing gentle circulation. A cartouche — a circle of parchment paper — achieves the same effect in Western kitchens.

For detailed scientific reading on umami synergy between glutamate and inosinate, the Umami Information Center provides peer-reviewed research. Explore more Soil technique writing at our experience hub, or read our post on binchotan and live-fire finishing — the natural partner to nimono braising.

Taste the Patience at the Table

Soil's private dining menus are built on techniques that take hours — or days — before a guest ever sees the plate. Nimono-braised courses feature across our seasonal menus. Available for intimate groups of four to twelve.

Book Private Dining
Chef Bernice Tan, Executive Chef and founder of Soil Dining Singapore

Bernice Tan

Executive Chef · Soil Dining Singapore

Bernice's approach to food begins where most recipes end — in the question of why a technique exists, and what it asks of an ingredient. Her multiple award-winning private dining experiences span contemporary Asian and Mediterranean cuisine, composed entirely from what is most alive in any given week. At Soil, the table becomes a canvas, and the season writes the brief.

© 2026 Soil · Chef Bernice Tan · Singapore
Lacto Fermented Pickling

Lacto-Fermented Pickling: Wild Ferment Craft | Soil Dining
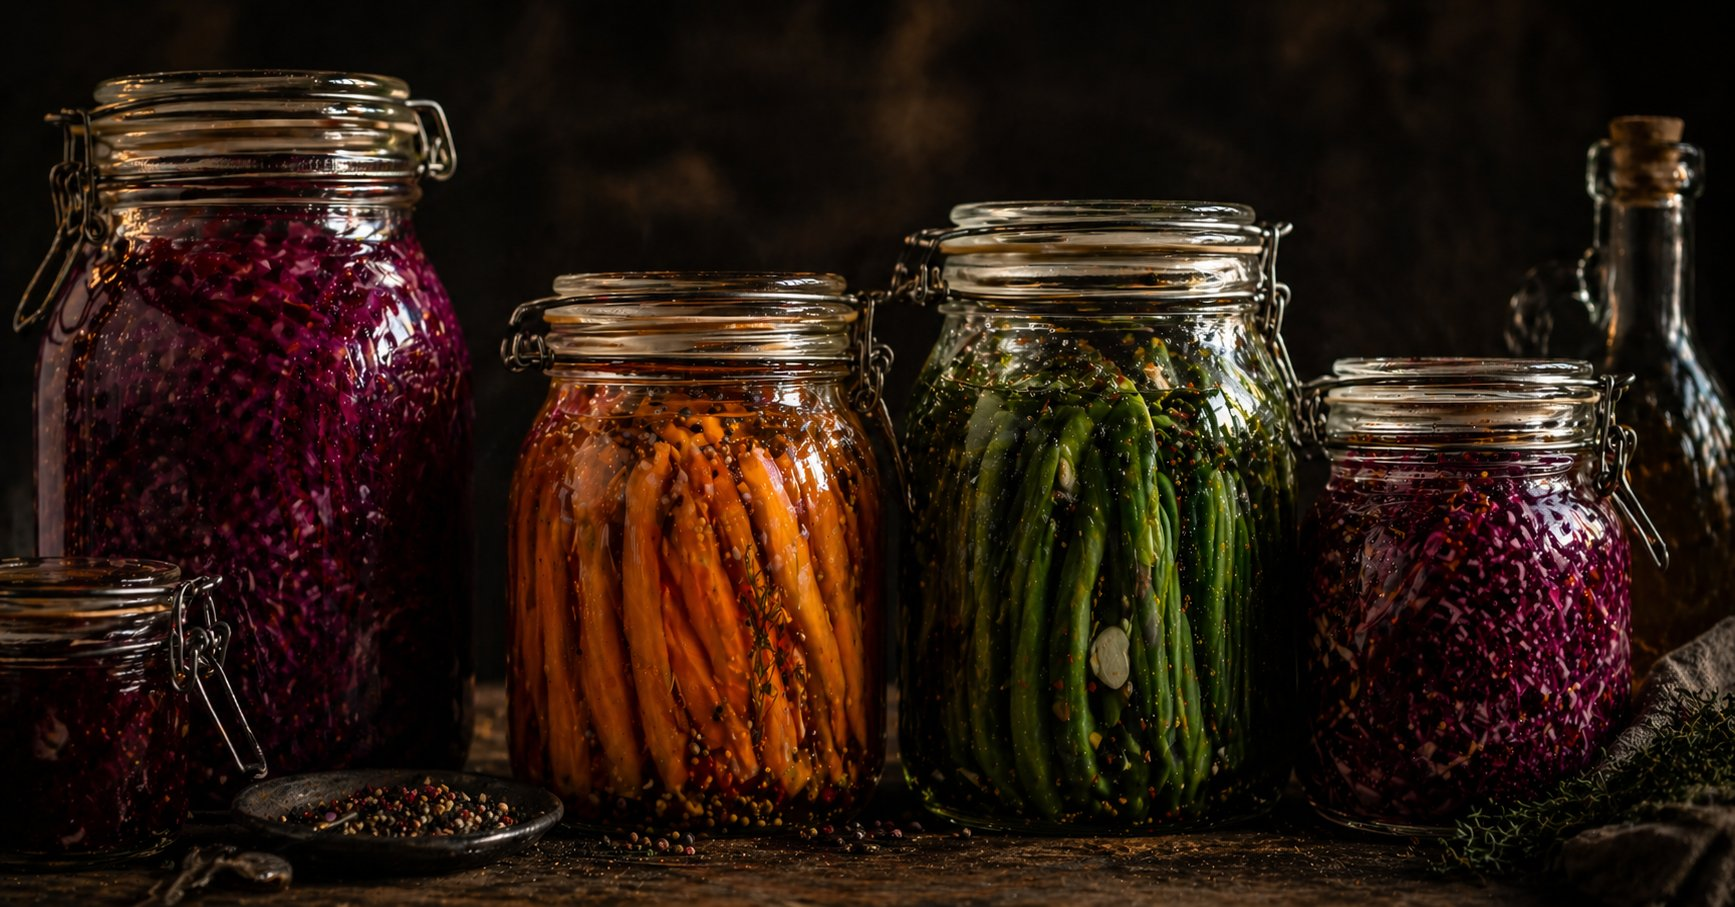
Glass jars of lacto-fermented vegetables — purple cabbage, orange carrots, green beans — arranged on a dark wooden surface with dramatic moody lighting

Cooking Technique · Soil Dining

Lacto-Fermented Pickling:
Wild and Alive

No vinegar. No heat. Just salt, time, and the living bacteria that transform vegetables into something entirely new

Inside a sealed jar, in the dark, something alive is happening. Bacteria that have lived on the surface of vegetables since before human civilisation began are converting sugar into acid, dropping the pH, building flavour compounds that no recipe can manufacture. This is not preservation. It is transformation — wild, unpredictable, and more flavourful than anything vinegar has ever produced.

Key Takeaways

  • Lacto-fermentation uses naturally occurring Lactobacillus bacteria — no starter culture, no vinegar, no heat required
  • Salt concentration is the single most critical variable — too little invites spoilage, too much blocks fermentation entirely
  • Lacto-fermented pickles are living foods containing active probiotics; vinegar pickles are not
  • Cooler, slower fermentation produces more complex, nuanced flavour than fast room-temperature ferments
  • Tannin-rich leaves — grape, oak, horseradish — added to the jar maintain crunch by inhibiting pectin-degrading enzymes

Why Lacto-Fermentation Belongs in Every Serious Kitchen

Vinegar pickling is fast, reliable, and consistent. It is also a dead end — literally. The acetic acid in vinegar kills the bacteria on vegetable surfaces, arresting all biological activity and producing a pickle that is preserved but inert. Lacto-fermentation takes the opposite approach. Salt suppresses harmful pathogens while creating conditions in which Lactobacillus bacteria — present on every unwashed vegetable surface — thrive, multiply, and produce lactic acid that preserves and transforms simultaneously.

The result is a living food: tangy, complex, evolving over days and weeks, with a flavour profile that no vinegar brine can approach. At Soil Dining, lacto-fermented vegetables appear across our menus as both a preparation technique and a philosophy — the idea that the best flavour in any ingredient is often already there, waiting for the right conditions to emerge.

Understanding lacto-fermentation is understanding that salt is not just seasoning — it is selection. It chooses which microorganisms survive and which do not, directing the biological outcome of the jar as surely as any recipe instruction. For anyone curious about Singapore private dining built around living flavour, this is where zero-waste cooking and microbiome science converge.

Lacto-Fermentation vs. Other Pickling Methods: A Direct Comparison

MethodPreservation AgentBacteria PresentFlavour ProfileShelf Life
Lacto-fermentationLactic acid (produced in situ)Yes — living probioticsComplex, round, tangy, evolvingMonths refrigerated
Vinegar picklingAcetic acid (added externally)No — bacteria killedSharp, one-dimensional, fixed6–12 months sealed
Salt-curing (no brine)Osmotic dehydrationMinimalConcentrated, savoury, denseWeeks refrigerated
Sugar preservingOsmotic pressure / sugarNoSweet, jammy, concentratedMonths sealed
Koji fermentationEnzymatic (koji enzymes)Mould-driven, not bacteriaUmami-forward, deeply savouryDays to weeks refrigerated

Chef's Tip

Never use iodised table salt for lacto-fermentation. Iodine is added to salt specifically because it kills bacteria — which is exactly the opposite of what fermentation requires. Use fine sea salt, kosher salt, or pickling salt. Weigh your salt rather than measuring by volume; different salts have very different densities and a volumetric measure can be wildly inaccurate.

The Four Pillars of Lacto-Fermentation

1. Salt — Selection, Not Just Seasoning

Salt is the architect of lacto-fermentation. At the correct concentration — 2–3% by weight of water for a brine, or 2% by weight of vegetable for dry-salted preparations — salt creates an environment where Lactobacillus bacteria survive and harmful pathogens like Listeria and Salmonella cannot. Below 1.5%, the brine may not suppress harmful bacteria effectively. Above 4%, fermentation slows dramatically and may not produce sufficient lactic acid.

The salt concentration also directly influences the final flavour. A 2% brine produces a clean, bright pickle. A 3% brine produces something more complex, slightly saltier, with deeper umami character from the slower bacterial activity. At Soil, we adjust salt percentage based on the vegetable — delicate herbs at 2%, dense roots at 2.5–3%.

2. Anaerobic Environment — Keep Oxygen Out

Lactobacillus bacteria are anaerobic — they thrive without oxygen. Oxygen, however, supports the growth of mould and kahm yeast (the white film that forms on pickle surfaces). Keeping vegetables submerged below the brine surface at all times is the single most important practical step in successful fermentation. Any vegetable exposed to air above the brine line will develop surface mould.

Professional fermentation uses airlock lids that allow CO₂ produced by fermentation to escape without allowing oxygen in. At home, a clean zip-lock bag filled with brine placed on top of the vegetables inside the jar achieves the same submersion effect. The jar should be loosely covered — not sealed airtight — to allow CO₂ to escape during active fermentation.

3. Temperature — The Speed and Complexity Trade-off

Temperature governs the speed and character of fermentation. At 22–26°C (Singapore ambient temperature), fermentation is active and fast — most vegetables reach eating acidity within 5–7 days. The flavour produced at this speed is bright and clean. At cooler temperatures — 12–18°C — fermentation slows significantly, taking 2–4 weeks, but produces a more complex, nuanced, layered flavour as a broader range of bacterial species participate in the process.

For fine dining applications at Soil, slow cold fermentation is preferred. The 2–4 week refrigerator ferment produces pickles with depth and complexity that room-temperature ferments cannot match — the additional time allows secondary fermentation compounds to develop, contributing the characteristic gentle effervescence and long finish of a truly well-made lacto pickle.

4. Tannins — The Crunch Preservers

One of the most common disappointments in home fermentation is soft pickles — vegetables that lose their crunch during the process. This happens because the bacteria naturally produce pectinase enzymes that break down pectin, the structural compound responsible for vegetable crispness. The fix is elegant: add tannin-rich plant material to the jar. Grape leaves, oak leaves, horseradish leaves, or blackcurrant leaves contain tannins that inhibit pectinase activity, preserving the cell structure and maintaining crunch throughout fermentation. One or two leaves per jar is sufficient.

Chef's Tip

At Soil, we ferment julienned green mango with 2% brine, fresh turmeric, and a single kaffir lime leaf for 5 days at room temperature. The result sits at the intersection of Southeast Asian pickling tradition and the clean lactic tang of European fermentation — served alongside braised preparations as a sharp, living counterpoint to richness. The kaffir lime leaf adds aroma without altering the fermentation process.

"Salt does not preserve by killing everything. It preserves by choosing — selecting the bacteria that transform rather than those that destroy."

Lacto-Fermentation Across Culinary Traditions

Korea — Kimchi and the Culture of Fermentation

Kimchi is the most recognisable lacto-fermented vegetable preparation in the world — and one of the most complex. Traditional baechu kimchi (napa cabbage kimchi) undergoes a two-stage process: dry-salting the cabbage to draw out moisture and soften cell walls, followed by coating with a paste of gochugaru, garlic, ginger, and salted seafood before a cold fermentation of weeks or months. The seafood components — jeotgal — introduce additional flavour compounds and accelerate fermentation through amino acid content. Korean fermentation culture treats kimchi not as a condiment but as a living pantry staple, maintained and tasted daily as it develops.

Europe — Sauerkraut, Cornichons and the Brine Tradition

European lacto-fermentation runs from German sauerkraut — dry-salted cabbage fermented in its own brine — to French cornichons lacto-pickled with tarragon and pearl onions, to Eastern European brine-fermented whole cucumbers, beets, and garlic. The tradition is ancient and deeply practical: in climates where fresh vegetables disappeared in winter, fermentation was survival. The flavour intelligence accumulated over centuries — the understanding that a longer, colder ferment produces better flavour than a quick one — is directly applicable in any modern kitchen.

Southeast Asia — Sour, Alive and Always Present

Across Southeast Asia, lacto-fermented preparations form the acidic backbone of entire meal structures. Singaporean achar — spiced pickled vegetables — uses a hybrid of vinegar and natural fermentation. Thai pak dong (pickled vegetables) and Vietnamese dưa cải (fermented mustard greens) are fully lacto-fermented, providing the bright sourness that cuts through the rich, fat-forward dishes they accompany. At Soil, this Southeast Asian instinct for sour-as-balance directly informs how we deploy fermented elements across the menu — not as a novelty, but as essential structure.

Chef's Tip

Never discard lacto-fermentation brine. After the vegetables are finished, the brine is saturated with lactic acid, dissolved minerals, amino acids, and active bacteria. Use it as: a seasoning acid in salad dressings, a marinade base for proteins, a splash in cocktails, a starter brine to accelerate the next batch of fermentation, or reduced slightly as a punchy condiment. Brine is not waste — it is the most concentrated product of the jar.

Common Mistakes in Lacto-Fermentation — and How to Fix Them

Mistake 1: Using iodised salt

Iodine kills bacteria — including the Lactobacillus essential for fermentation. Iodised table salt is designed to be antimicrobial. Using it produces a brine that suppresses all bacterial activity, resulting in a jar that simply rots rather than ferments.

Fix: Use fine sea salt, kosher salt, or dedicated pickling salt. Always check the label — iodised salt will state it clearly.

Mistake 2: Incorrect salt concentration

Too little salt allows harmful bacteria to outcompete Lactobacillus. Too much salt blocks fermentation entirely. Both produce unusable results — either spoiled or just brined vegetables with no lactic acid development.

Fix: Always weigh salt and water. Use 20g non-iodised salt per 1 litre of filtered water (2% brine). Never estimate by volume.

Mistake 3: Vegetables above the brine line

Any vegetable surface exposed to air will develop mould — usually white kahm yeast, sometimes green or black mould. This does not necessarily spoil the entire batch, but it signals an anaerobic failure and degrades flavour quality.

Fix: Use a zip-lock bag filled with brine as a weight on top of vegetables, or a small jar filled with water. Every surface must stay submerged at all times.

Mistake 4: Sealing the jar airtight during active fermentation

Active fermentation produces CO₂. A sealed jar builds pressure rapidly — at best it leaks brine everywhere, at worst it explodes. Always allow gas to escape during the active fermentation phase.

Fix: Use an airlock lid, or leave the jar lid loosely placed rather than sealed during the first 5–7 days. Burp the jar daily if using a standard lid — open briefly to release pressure.

Mistake 5: Using chlorinated tap water

Municipal tap water contains chlorine or chloramine specifically to kill bacteria. Adding it to a fermentation brine suppresses the Lactobacillus that make the process work.

Fix: Use filtered water, boiled and cooled tap water, or still mineral water. Leave tap water in an open container for 30 minutes before using — chlorine dissipates, though chloramine does not.

Mistake 6: Opening and tasting too early

Every time the jar is opened during active fermentation, oxygen is introduced and the anaerobic environment is disrupted. Frequent opening also risks introducing surface contaminants.

Fix: Leave the jar undisturbed for the first 3–4 days. After that, taste once every 2 days to track development. When the flavour is where you want it, move to the refrigerator to slow fermentation significantly.

Quick Reference: Lacto-Fermentation Guide by Vegetable

VegetableMethodBrine %Room Temp TimeFlavour Notes
Cabbage (sauerkraut)Dry salt, massage2% of vegetable weight7–14 daysTangy, slightly effervescent, clean
DaikonBrine submerge2.5%5–7 daysMildly sour, crisp, clean
Carrot (julienned)Brine submerge2%5–7 daysSweet-sour, bright, crisp
Green beansBrine submerge + tannin leaf2.5%7–10 daysTangy, herbal, firm
CucumberBrine submerge + tannin leaf3%3–5 daysBright sour, crunchy, fresh
Green mangoBrine submerge2%4–6 daysTart, tropical, vivid
Fennel (sliced)Brine submerge2%6–8 daysAnise-forward, sour, complex

Frequently Asked Questions

What is lacto-fermentation?

Lacto-fermentation is a natural preservation process in which Lactobacillus bacteria — present on vegetable surfaces — convert sugars into lactic acid in a salt brine environment. No vinegar, heat, or starter culture is required. The salt suppresses harmful bacteria while beneficial Lactobacillus thrive, producing a tangy, complex, living pickle.

What is the difference between lacto-fermented pickles and vinegar pickles?

Vinegar pickles are preserved through externally added acetic acid — flavour is immediate, sharp, and fixed. Lacto-fermented pickles develop acidity through living bacteria converting the vegetable's own sugars into lactic acid over days or weeks. The flavour is rounder, more complex, and evolves over time. Lacto-fermented pickles contain active probiotics; vinegar pickles do not.

How much salt do you use for lacto-fermentation?

The standard brine ratio is 2–3% salt by weight of water — approximately 20–30g of non-iodised salt per litre. For dry-salted vegetables like cabbage, use 2% salt by weight of the vegetable itself. Always weigh rather than measure by volume — different salts have very different densities.

How long does lacto-fermentation take?

At room temperature (22–26°C), most vegetables reach good eating acidity within 5–10 days. Cooler temperatures slow the process and develop more complex flavour — refrigerator fermentation over 3–4 weeks produces a rounder, more layered result than fast room-temperature ferments.

Which vegetables ferment best?

Firm, dense vegetables with low water content — cabbage, carrot, daikon, turnip, fennel, green beans, cauliflower — ferment most reliably. Adding tannin-rich leaves such as grape, oak, or horseradish leaves helps maintain crunch by inhibiting the pectin-degrading enzymes responsible for softening.

Is lacto-fermented food safe to eat?

Yes — lacto-fermentation is one of the oldest and safest food preservation methods in human history. The lactic acid produced creates an environment inhospitable to harmful pathogens. A properly fermented pickle smells pleasantly sour and tangy. Discard any batch that smells putrid, shows pink or black mould, or produces an off-colour brine.

Can I use tap water for lacto-fermentation?

Chlorinated tap water can inhibit or kill the Lactobacillus bacteria essential for fermentation. Use filtered water, boiled and cooled tap water, or still mineral water. Chlorine dissipates if tap water is left open for 30 minutes, though chloramine — used in some municipal supplies — does not and requires filtration to remove.

For peer-reviewed research on Lactobacillus activity and lactic acid fermentation, this NIH review on fermented foods and health provides rigorous scientific grounding. Explore more Soil fermentation writing at our experience hub, or read our post on koji fermentation and enzymatic flavour transformation.

Taste Something Alive

Lacto-fermented elements appear across Soil's seasonal private dining menus — as counterpoints, condiments, and courses in their own right. Available for intimate groups of four to twelve guests.

Book Private Dining
Chef Bernice Tan, Executive Chef and founder of Soil Dining Singapore

Bernice Tan

Executive Chef · Soil Dining Singapore

Bernice's approach to food begins where most recipes end — in the question of why a technique exists, and what it asks of an ingredient. Her multiple award-winning private dining experiences span contemporary Asian and Mediterranean cuisine, composed entirely from what is most alive in any given week. At Soil, the table becomes a canvas, and the season writes the brief.

© 2026 Soil · Chef Bernice Tan · Singapore

Koji Fermentation

Koji Fermentation Technique: Time as Flavour | Soil Dining
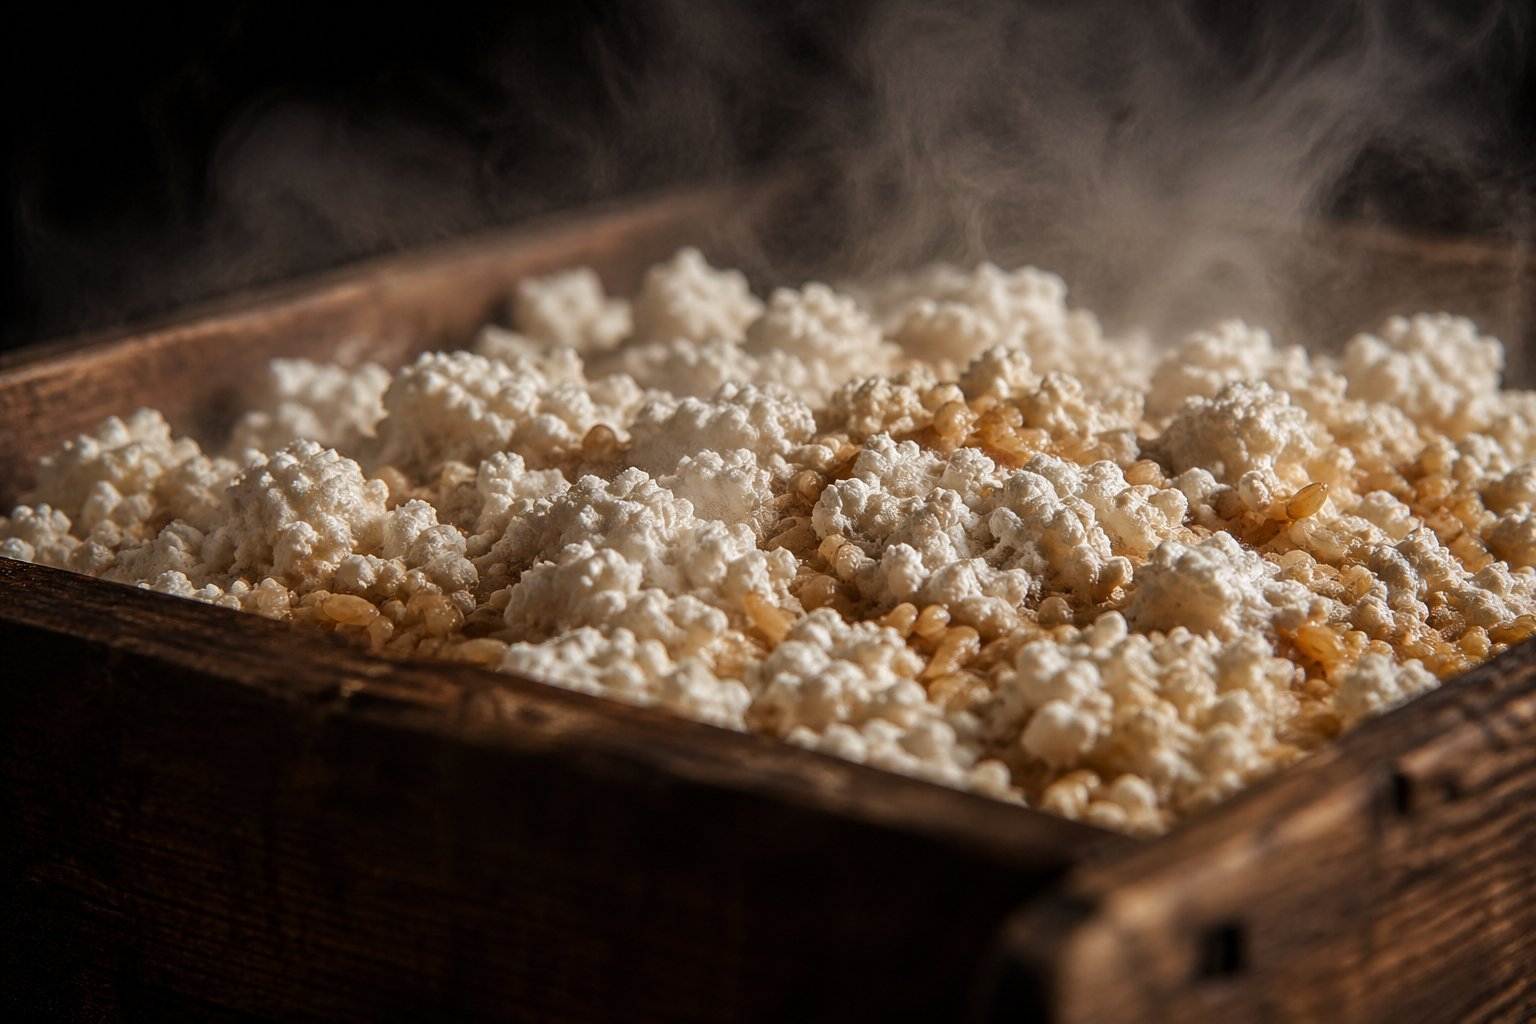
White koji mould blooming across golden rice grains in a wooden koji tray, pale steam rising in soft editorial light

Cooking Technique · Soil Dining

Koji Fermentation:
Time as Ingredient

The ancient Japanese mould that unlocks umami, sweetness and transformation — and why modern kitchens cannot live without it

There is a living thing in the best kitchens in the world, and it works in the dark. It does not require heat, or blade, or flame. It requires only time, warmth, and the patient willingness to let biology do what no amount of cooking skill can replicate. Aspergillus oryzae — koji mould — has been quietly transforming food in Japan for over a thousand years. Fine dining is finally paying attention.

Key Takeaways

  • Koji is the mould-inoculated grain behind miso, soy sauce, sake, and mirin — and the most powerful natural umami tool in a chef's arsenal
  • Enzymes produced by koji break proteins into amino acids and starches into sugars, creating flavour complexity that cannot be rushed
  • Shio koji marinades tenderise and deeply season proteins from within — without salt overpowering them
  • Koji butter, koji-cured meats and amazake are accessible entry points for home cooks and professional kitchens alike
  • Temperature consistency — not skill — is the single most important variable in successful koji cultivation

Why Koji Has Become the Most Important Fermentation Culture in Modern Kitchens

Ask any chef working at the intersection of Asian and European traditions what single ingredient has most changed their cooking in the past decade, and the answer is increasingly the same. Not a spice. Not a technique. A living mould. Koji — Aspergillus oryzae — is the culture responsible for miso, soy sauce, sake, mirin, and rice vinegar. For most of culinary history, its influence was invisible, buried inside the condiments and ferments that underpinned Japanese cuisine. Now it is being used directly: as a marinade, a butter, a curing agent, a sweetener, and a flavour amplifier with no equivalent in any other tradition.

At Soil Dining, koji sits at the centre of how we approach seasoning and depth. It connects the Japanese reverence for patience and process with the Mediterranean instinct for transforming simple ingredients into something profound. Understanding koji is understanding that time is not a constraint — it is an ingredient.

This post covers what koji actually does to food at a molecular level, how to work with it at home, and why the results are unlike anything achievable through conventional cooking. For anyone curious about Singapore private dining that takes fermentation seriously, this is where it starts.

Koji vs. Other Fermentation Cultures: A Direct Comparison

CultureTypePrimary ActionFlavour ResultKey Products
Koji (A. oryzae)MouldProtease + amylase enzymesDeep umami, natural sweetnessMiso, soy, sake, shio koji, koji butter
LactobacillusBacteriaLactic acid productionBright, clean sournessKimchi, yoghurt, lacto pickles
Saccharomyces (yeast)YeastAlcohol fermentationEthanol, CO₂, fruity estersWine, beer, bread, sake (alongside koji)
Penicillium roquefortiMouldLipolysis, proteolysisSharp, pungent, blue-veined complexityBlue cheese, Roquefort, Gorgonzola
AcetobacterBacteriaAcetic acid from alcoholSharp, clean acidityRice vinegar, apple cider vinegar

Chef's Tip

Koji spores are available from Japanese fermentation suppliers online and in specialty stores across Singapore. Buy tane koji — the dry spore powder — not pre-made rice koji. Tane koji stores for months in the freezer and gives you full control over the inoculation process and the substrate you grow it on.

The Four Things Koji Does to Food

1. Proteolysis — Breaking Proteins into Flavour

Koji produces protease enzymes — molecular scissors that cut long protein chains into shorter peptides and individual amino acids. The most flavour-significant of these is glutamic acid: the amino acid responsible for umami, the fifth taste, the deep savoury quality that makes food feel complete and satisfying rather than flat.

When a piece of fish or meat is marinated in shio koji, these proteases begin working on the surface proteins immediately. Over 24–48 hours they soften the outer texture, season the interior without oversalting, and generate glutamate depth that cannot be added in any other way. It is the difference between food that tastes seasoned and food that tastes transformed.

2. Amylolysis — Converting Starch to Sugar

Alongside proteases, koji produces amylase enzymes that break down complex starches into simple sugars — primarily glucose and maltose. This is the foundation of amazake, the naturally sweet fermented rice drink, and the mechanism that provides sake's fermentable sugars for yeast. In the kitchen, this amylolytic activity means koji can add natural sweetness to a dish without sugar being added — a subtler, more complex sweetness that reads as depth rather than confection.

3. Lipolysis — Unlocking Fat Flavour

Koji also produces lipase enzymes that break down fats into fatty acids and glycerol. This is less pronounced than its protease activity but deeply relevant when koji is used with fatty substrates — butter, pork belly, fish with high fat content. The breakdown of fats creates new aromatic compounds and rounds the overall flavour profile, contributing to that characteristic richness and long finish in well-made miso and aged koji products.

4. Moisture Management — The Invisible Texture Tool

One of the least-discussed but most practical effects of shio koji as a marinade is its impact on moisture retention during cooking. The proteases partially denature surface proteins before heat is applied, which paradoxically helps them hold moisture better during cooking — particularly at high heat. Fish and chicken marinated in shio koji consistently cook juicier than those seasoned with salt alone, even when exposed to the same temperature and duration.

Chef's Tip

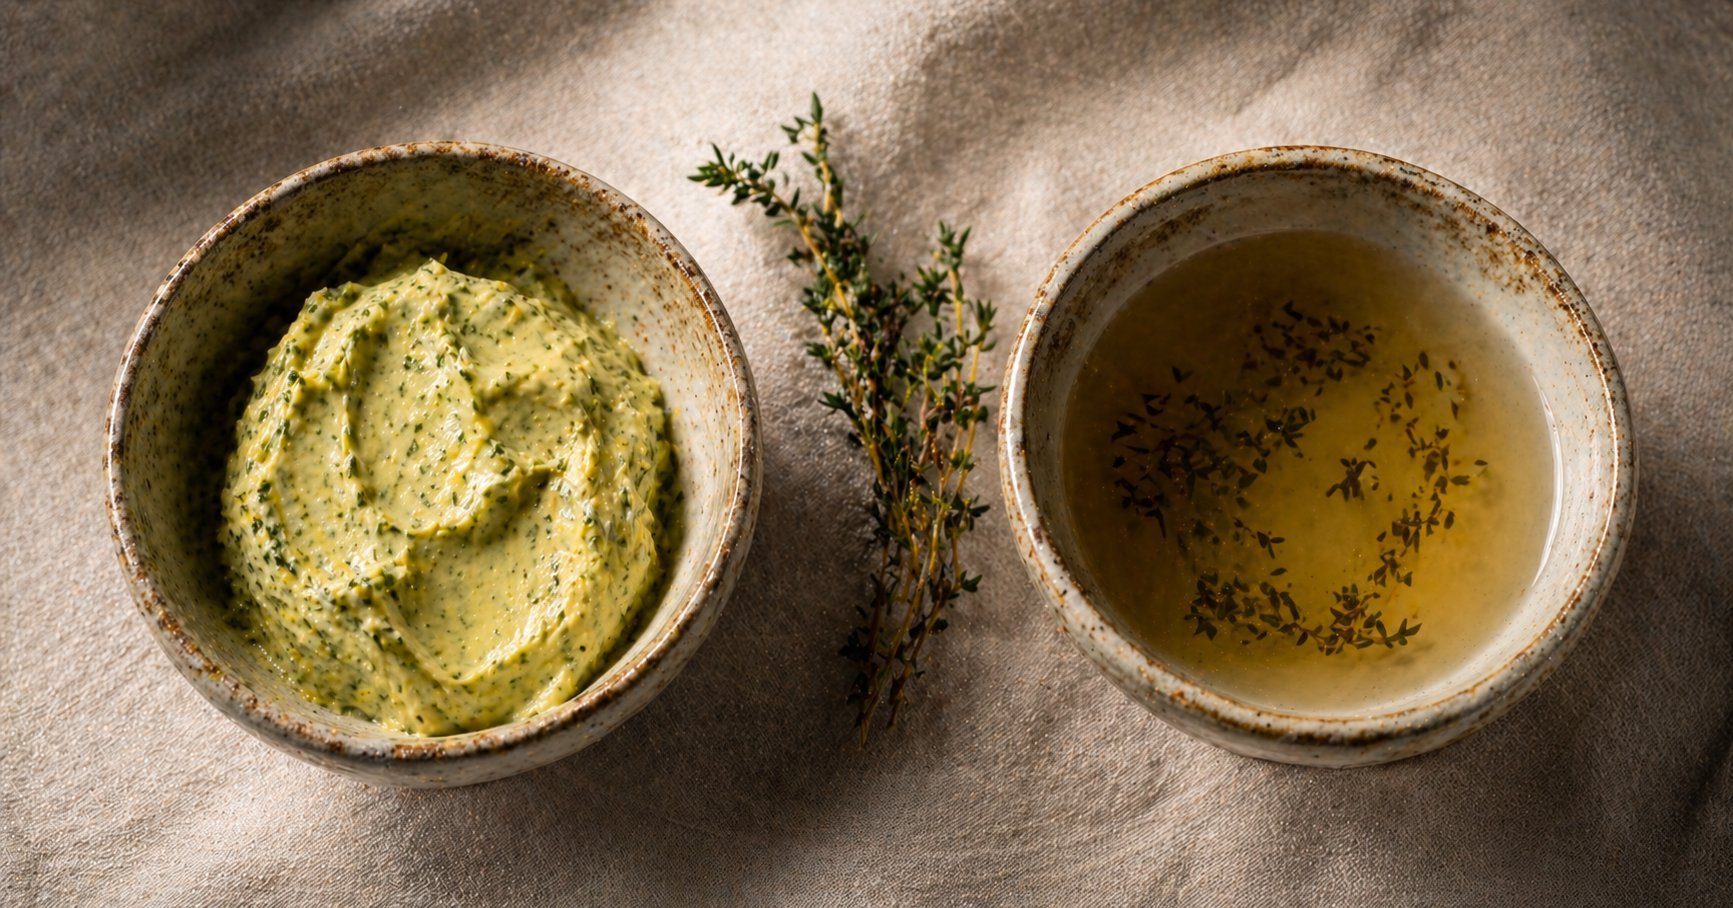
When making koji butter, use unsalted cultured butter and fold in 15–20% of its weight in white rice koji. Rest for 24–48 hours at room temperature, then refrigerate. The result has an extraordinary savoury-sweet depth — use it to baste proteins in the last minutes of cooking, or serve room temperature alongside bread as a course in itself.

"Koji does not add flavour. It reveals the flavour that was always inside the ingredient, waiting for the right enzyme to release it."

Koji Across Culinary Traditions

Japan — The Foundation of an Entire Cuisine

In Japan, koji is not an ingredient — it is the infrastructure of flavour. Miso, shoyu, mirin, sake, amazake, shio koji, shōchū — every one of these foundational components of Japanese cuisine depends on Aspergillus oryzae. The koji room — the kojimuro — was historically the most protected and closely guarded space in any sake brewery or miso producer, maintained at precise temperature and humidity for the 40–50 hours of cultivation. The reverence for koji in Japan reflects an understanding that patience applied correctly is the highest form of culinary technique.

Korea — Parallel Wisdom, Different Expression

Korean fermentation tradition uses a related but distinct culture called meju — a dried soybean block inoculated with a variety of moulds including Aspergillus species — as the foundation for doenjang (fermented soybean paste) and ganjang (Korean soy sauce). The flavour profile differs from Japanese miso: earthier, more complex, sometimes more pungent. At Soil, both traditions inform how we think about fermented seasoning — as a base layer of depth built before any cooking begins.

The Mediterranean Parallel — Aged and Fermented Flavour Builders

Mediterranean cuisines have their own long tradition of patience-as-technique. Aged Parmigiano Reggiano develops its characteristic glutamate-rich crystalline texture through proteolysis — the same enzymatic process koji drives. Anchovy paste, aged balsamic vinegar, and colatura di alici all achieve their depth through time and microbial action. The logic is identical to koji fermentation. At Soil, this parallel allows koji-fermented elements to sit alongside Mediterranean fermented condiments naturally — they are products of the same culinary philosophy, expressed in different languages.

Chef's Tip

To make shio koji at home: combine 100g white rice koji with 35g fine sea salt and 130ml water. Mix well, transfer to a glass jar, and ferment at room temperature for 7–10 days, stirring daily. It is ready when the mixture smells sweet, slightly floral, and savoury — with no harsh alcohol or off-notes. Refrigerate and use within three months.

Common Mistakes in Koji Fermentation — and How to Fix Them

Mistake 1: Inconsistent temperature during cultivation

Koji requires a stable 28–32°C to grow correctly. Too cool and the mould grows slowly, producing weak enzyme activity. Too hot and the mould dies, or stress metabolites create off-flavours.

Fix: Use a proofing box, a dehydrator set to 30°C, or an oven with just the light on and a thermometer inside. Check temperature every 6 hours for the first batch.

Mistake 2: Insufficient humidity during cultivation

Koji needs humidity above 70% to grow. Dry conditions cause the rice surface to harden and prevent mycelium from penetrating the grain, resulting in surface-only mould with minimal enzyme production.

Fix: Place a damp cloth over the koji tray or cultivate inside a loosely covered container. Mist lightly if the surface appears to be drying out after 24 hours.

Mistake 3: Using wet rice

Excess surface moisture on the rice encourages bacterial contamination rather than koji growth. Wet rice also prevents spores from adhering evenly to the grain surface.

Fix: Steam rice rather than boil it, and spread on a tray to cool and dry for 30–60 minutes before inoculating with tane koji. The grains should feel slightly tacky but not wet.

Mistake 4: Over-marinating proteins in shio koji

Shio koji's proteases are powerful. Leaving fish or delicate proteins for longer than 48 hours breaks surface proteins down excessively — the texture becomes mushy and the flavour turns sharp rather than sweet-savoury.

Fix: Fish needs 6–12 hours maximum. Chicken 24 hours. Beef and pork can handle 48 hours. Always pat dry completely before cooking.

Mistake 5: Cooking koji-marinated proteins at too high a heat

The sugars generated by koji's amylase activity caramelise rapidly. High direct heat burns these sugars before the protein interior has cooked through, producing a blackened rather than golden exterior.

Fix: Cook koji-marinated proteins over medium heat, or use a two-step approach — gentle oven or sous vide first, then a brief high-heat finish to caramelise without burning.

Mistake 6: Discarding the koji liquid

The liquid that separates from rice koji during shio koji making — and from koji butter during resting — is saturated with enzymes and amino acids. Most people discard it. It is one of the most flavourful liquids in the kitchen.

Fix: Reserve all koji liquid. Use it as a seasoning base in sauces, as a component in dressings, or reduced slightly as a glaze. Nothing is wasted.

Quick Reference: Koji Applications & Timings

ApplicationSubstrateTime RequiredFlavour Result
Shio koji (marinade/seasoning)Rice koji + salt + water7–10 days, room tempSweet-savoury, enzymatic depth
Koji butterUnsalted butter + rice koji24–48 hours, room tempNutty, umami-rich, naturally sweet
AmazakeRice koji + cooked rice + water8–12 hours at 55–60°CNaturally sweet, milky, gentle
Koji-cured beef / porkShio koji rubbed on meat24–48 hours, refrigeratedDeeply seasoned, tender, juicy
Koji-cured fishShio koji on fish fillet6–12 hours, refrigeratedSweet, firm texture, no fishiness
Mugi (barley) misoBarley koji + soybeans + salt3–6 months minimumEarthy, rustic, deeply fermented
White rice koji cultivationSteamed rice + tane koji40–50 hours at 28–30°CBase culture for all applications

Frequently Asked Questions

What is koji fermentation?

Koji fermentation uses Aspergillus oryzae — a mould cultivated on grains like rice or barley — to produce enzymes that break down proteins into amino acids and starches into sugars. The result is deep, natural umami and complex sweetness without artificial flavour enhancers.

What is koji used for in cooking?

Koji is the foundation of miso, soy sauce, sake, mirin, and rice vinegar. In modern fine dining it is used to make koji butter, koji-cured meats, amazake, shio koji marinades, and koji-aged preparations. It is one of the most versatile fermentation agents in any kitchen.

How long does koji fermentation take?

Growing koji on rice takes 40–50 hours at a controlled 28–30°C with high humidity. A shio koji marinade needs 7–10 days to develop full flavour. Koji butter can be made in 24–48 hours. Miso aged with koji takes anywhere from 3 months to 3 years depending on depth desired.

Can I make koji at home?

Yes. Koji spores (tane koji) are available from Japanese fermentation suppliers and online. You need cooked rice or barley, the spores, and a warm humid environment — a proofing box or oven with the light on works well. Temperature consistency between 28–32°C is the critical variable.

What does koji taste like?

Koji itself is mildly sweet, slightly floral, and deeply savoury — a soft, rounded umami with no sharpness. When used as a marinade or seasoning, it adds natural glutamate depth that reads as intense savouriness without tasting fermented or sour.

What is shio koji and how is it used?

Shio koji is a mixture of rice koji, salt, and water fermented for 7–10 days. Used as a marinade, seasoning, and curing agent, proteins marinated in shio koji for 24–48 hours become noticeably more tender, juicier, and deeply flavoured — the enzymes break down surface proteins and season from within.

Is koji the same as miso?

No — koji is an ingredient used to make miso, not miso itself. Miso is produced by fermenting soybeans with salt and koji over months or years. Koji is the active culture: the mould-inoculated grain providing the enzymes driving fermentation. You cannot make miso without koji, but koji has many uses beyond miso production.

For a rigorous scientific overview of Aspergillus oryzae enzyme activity, the ScienceDirect food science reference on Aspergillus oryzae provides peer-reviewed depth. Explore Soil's full approach to fermentation and private dining in Singapore, or continue reading with our post on binchotan and live-fire finishing.

Taste Time at the Table

Soil's private dining menus incorporate koji fermentation across courses — in marinades, butters, and aged elements that took days or weeks to become what they are. Available for intimate groups of four to twelve.

Book Private Dining
Chef Bernice Tan, Executive Chef and founder of Soil Dining Singapore

Bernice Tan

Executive Chef · Soil Dining Singapore

Bernice's approach to food begins where most recipes end — in the question of why a technique exists, and what it asks of an ingredient. Her multiple award-winning private dining experiences span contemporary Asian and Mediterranean cuisine, composed entirely from what is most alive in any given week. At Soil, the table becomes a canvas, and the season writes the brief.

© 2026 Soil · Chef Bernice Tan · Singapore
Herb Infused Oils.

Herb-Infused Oils: Botanical Fat Extraction | Soil Dining
Vivid emerald herb oil being poured from a white ceramic jug onto a fine dining plate, surrounded by fresh basil, tarragon and chives on dark slate

Cooking Technique · Soil Dining

Herb-Infused Oils & Fat Extraction:
Liquid Botanicals

How chefs capture pure botanical flavour in fat — and why the method determines everything about the result

Before a plate arrives, before any garnish is placed or sauce is spooned, there is a moment in the kitchen where colour itself becomes a decision. A vivid green ribbon of herb oil — basil, tarragon, chive — holds more information than it appears to. It tells you about temperature, timing, and the precise understanding that fat and botanical flavour are not separate things. They are one.

Key Takeaways

  • Fat is the most efficient carrier of botanical flavour — it dissolves aromatic compounds that water cannot reach
  • The blanch-and-blend method produces the most vivid colour and freshest flavour — and takes under 15 minutes
  • Chlorophyll degradation, not skill, is the enemy of green herb oils — cold immediately after blending is the fix
  • Cold infusion preserves the most delicate aromatic compounds in floral or subtle herbs
  • Oil choice is not neutral — the fat's own flavour either competes with or amplifies the botanical

Why Fat Extracts What Water Cannot

The aromatic compounds responsible for herb flavour — terpenes, phenols, aldehydes, esters — are predominantly fat-soluble, not water-soluble. Steeping basil in hot water produces a pale, thin infusion. The same basil blended with oil releases its aromatic compounds completely, carried into the fat and suspended there until the oil reaches the palate.

This is not intuitive. Most people reach for water when they want flavour from a fresh herb — tea, broth, infusion. But water-based extractions capture only a fraction of what a herb contains. Fat captures everything. This is why a spoonful of good basil oil tastes more intensely of basil than a cup of basil tea ever could.

At Soil Dining, herb oils are not garnishes. They are seasoning — applied with the same intentionality as salt, acid, or heat. Understanding how to extract botanical flavour into fat correctly is foundational to cooking that feels alive on the plate.

Three Methods Compared: Cold Infusion vs. Heat Infusion vs. Blanch-and-Blend

MethodTime RequiredColour ResultFlavour ProfileBest For
Cold infusion24–72 hours, refrigeratedPale to goldenSubtle, rounded, mellowRosemary, thyme, garlic, floral herbs
Heat infusion (50–60°C)30–60 minutesMedium green to goldenIntense, slightly cooked characterWoody herbs, spices, dried botanicals
Blanch-and-blend10–15 minutesVivid emerald greenFresh, bright, high-impactBasil, tarragon, chive, parsley, chervil
Raw blend (no blanch)5 minutesBright but unstableGrassy, raw, oxidises quicklyImmediate use only, not recommended for service
Sous vide infusion1–2 hours at 65°CStable medium greenClean, controlled, consistentProfessional kitchens, batch production

Chef's Tip

For the blanch-and-blend method, the ice bath is not optional — it is the step. Thirty seconds in boiling water softens cell walls and releases chlorophyll. Immediate ice water shock stops enzyme activity that degrades that chlorophyll into dull olive-brown within minutes. Skip the shock and you lose the green before the oil even reaches the blender.

The Four Pillars of Herb Oil Extraction

1. Chlorophyll — The Pigment That Tells the Truth

Chlorophyll is the molecule responsible for the green in herbs, and it is also a reliable indicator of freshness and technique. When chlorophyll is intact, herb oil is vivid and electrically green. When it degrades — through heat, oxidation, or time — it converts to pheophytin, an olive-brown pigment that signals compromised flavour alongside compromised colour.

Professional kitchens use the colour of herb oil as a direct quality check. An herb oil that has gone dull has also lost a significant proportion of its aromatic volatiles. The appearance and the flavour degrade together. Keeping the oil refrigerated and using it within 3–5 days is not precaution — it is precision.

2. Fat Selection — The Carrier Shapes the Flavour

The oil chosen for infusion is not neutral. Grapeseed oil is almost entirely flavour-invisible — ideal when the herb must speak alone, without competition. A mild extra-virgin olive oil adds its own grassy, slightly bitter, fruity dimension — ideal when that character complements the botanical, as it often does with Mediterranean herbs. A heavy, assertive EVOO will dominate every herb except the most robust.

For delicate herbs — chervil, bronze fennel, shiso — always use a neutral carrier. Their aromatic compounds are so volatile and subtle that a competing fat will erase them entirely. For bold herbs — rosemary, sage, thyme — a characterful olive oil is a natural partner.

3. Temperature Control — The Window Is Narrow

Heat extracts aromatic compounds from herbs rapidly but destroys the most volatile ones equally fast. The window for heat infusion sits between 50–65°C — warm enough to open cell walls and release aromatics, cool enough to leave the most fragile compounds intact. Above 70°C, terpenes begin to evaporate rather than transfer into the oil. The resulting infusion is flatter, more cooked in character, less alive.

Sous vide infusion at a precise 65°C for 90 minutes is the most controlled approach available — consistent, repeatable, and scalable for service. For home cooks, a small saucepan over the lowest possible heat with a thermometer achieves the same logic with more attention required.

4. Straining and Finishing — Clarity as Craft

The final herb oil should be strained twice: first through a fine-mesh sieve to remove solids, then through a muslin cloth or coffee filter to achieve complete clarity. Cloudy oil is not inferior in flavour — but the visual precision of a clear, intensely coloured oil on a white plate is part of the dish. At the fine dining level, clarity is a signal of control, and control is what the guest is paying for.

Chef's Tip

Never squeeze the muslin cloth when straining herb oil. Pressure forces fine particulate through the cloth and clouds the oil permanently. Instead, let it drain under gravity — place the cloth over a bowl, pour in the blended mixture, and leave refrigerated for 2–4 hours. The resulting oil will be optically clear and intensely coloured.

"An herb oil that has gone dull has also lost its flavour. The colour and the aroma degrade together — colour is the clock."

Botanical Traditions Across Two Culinary Worlds

Mediterranean — Oil as the Grammar of Cooking

In Mediterranean cooking, olive oil is not a cooking medium — it is a flavour system. The tradition of finishing dishes with raw herb-scented oil is ancient: gremolata stirred into braised meats at the last moment, salmoriglio — olive oil, lemon, oregano — brushed onto grilled fish still hot from the fire, pistou swirled into Provençal soup. Every one of these is a fat-based botanical extraction applied at the point of maximum flavour transfer. The French and Italian instinct for finishing with oil is one of the most technically sound flavour principles in any culinary tradition.

Japanese — Delicacy and Restraint in Fat Use

Japanese cuisine uses fat-based flavour extraction differently — through kaeshi base sauces enriched with fat, through sesame oils that carry toasted aromatic compounds, through the use of fragrant yuzu rind pressed into oils at the moment of service. The Japanese principle of ma — the meaningful use of space and restraint — applies directly to herb oil use at Soil: a single precise ribbon of oil, placed with intention, rather than a pool that overwhelms the dish's architecture.

Southeast Asian — Aromatic Fat at Maximum Intensity

Across Southeast Asia, aromatic fat extraction operates at maximum intensity. Rempah — the spice pastes of Singapore and Malaysian cooking — are always fried in fat first, the fat becoming the vehicle for the concentrated aromatics of galangal, lemongrass, chilli, and candlenut. Chilli oils across Chinese and Thai traditions operate on the same principle: fat pulls the fat-soluble capsaicin and colour compounds from dried chilli, creating a concentrated aromatic carrier. At Soil, these Southeast Asian instincts inform how we think about herb oils — not as delicate finishing touches, but as bold flavour concentrates used with precision.

Chef's Tip

To make a Southeast Asian-inflected herb oil for contemporary plating: blend fresh pandan leaf with grapeseed oil using the blanch-and-blend method. The result is an extraordinarily vivid green oil with a vanilla-coconut-grass aroma unlike anything in Western herb oil tradition. Apply in drops to a dessert plate or alongside a rice course — the colour and aroma are immediate.

Common Mistakes in Herb Oil Making — and How to Fix Them

Mistake 1: Skipping the ice bath after blanching

Without immediate cold shock, residual heat continues cooking the herbs after they leave the boiling water. Chlorophyll converts to pheophytin within minutes, and the oil turns dull olive-green before it reaches the blender.

Fix: Prepare a large ice bath before you turn on the heat. The transfer from boiling water to ice must happen within 5 seconds.

Mistake 2: Using wet herbs in the blender

Water and oil do not mix. Herbs that carry excess water into the blender create an emulsified, cloudy oil that separates on the plate and carries diluted flavour.

Fix: After the ice bath, squeeze blanched herbs firmly in a clean cloth to remove as much water as possible before blending. Dry herbs transfer flavour into oil more efficiently.

Mistake 3: Blending at too low a speed

Aromatic compounds release from herb cells through mechanical disruption. A slow blend does not break cell walls completely, leaving significant flavour and colour trapped inside the plant matter.

Fix: Blend at maximum speed for a minimum of 2 minutes. The mixture should feel warm to the touch at the end — a sign that sufficient mechanical energy has been applied.

Mistake 4: Leaving herb oil at room temperature

Chlorophyll degradation and oxidation both accelerate at room temperature. An herb oil left out during service loses colour and flavour within 30–60 minutes.

Fix: Store herb oil over an ice bath during service. Portion into a small chilled container and replenish from the refrigerated stock as needed.

Mistake 5: Using old or wilted herbs

Herb oil concentrates whatever is in the herb. Wilted or yellowing herbs produce a dull, flat oil with reduced chlorophyll and depleted aromatic compounds — concentration amplifies weakness as much as quality.

Fix: Use herbs at peak freshness, ideally the same day of purchase. If leaves show any yellowing, use only the greenest portions for oil making and reserve the rest for stocks.

Mistake 6: Choosing the wrong oil for the herb

A strongly flavoured olive oil paired with a delicate herb like chervil or bronze fennel will completely overpower the botanical. The herb becomes invisible behind the fat.

Fix: Match oil intensity to herb intensity. Delicate herbs need neutral carriers — grapeseed or light sunflower. Bold herbs can handle characterful oils. When in doubt, use grapeseed.

Quick Reference: Herb Oil Methods & Results

HerbBest MethodOil CarrierTimeShelf Life
BasilBlanch-and-blendGrapeseed12 min3–5 days refrigerated
TarragonBlanch-and-blend or cold infusionGrapeseed12 min / 48 hrs3–4 days / 2 weeks
ChiveBlanch-and-blendGrapeseed10 min3 days refrigerated
RosemaryCold infusion or heat infusionMild EVOO48 hrs / 45 min2–3 weeks refrigerated
Pandan leafBlanch-and-blendGrapeseed12 min3 days refrigerated
ChervilCold infusion onlyGrapeseed24–36 hrs1 week refrigerated
ThymeHeat infusion or sous videMild EVOO45 min / 90 min SV2–3 weeks refrigerated

Frequently Asked Questions

How do you make herb-infused oil at home?

Blanch fresh herbs briefly in boiling water, shock in ice water, and squeeze dry. Blend with a neutral oil at high speed for 2–3 minutes, then strain through a fine-mesh sieve or muslin cloth. Refrigerate immediately. The entire process takes under 15 minutes and produces a vivid, intensely flavoured result.

What is the difference between cold-infused and heat-infused herb oil?

Cold infusion steeps herbs in oil over 24–72 hours at room temperature or refrigerated, producing subtle, rounded flavour. Heat infusion uses gentle warmth (50–60°C) to accelerate extraction, producing more intensity but at risk of destroying volatile aromatic compounds. Blanch-and-blend produces the most vivid colour and fresh flavour of all three methods.

Why do professional herb oils look so vibrantly green?

The vivid green comes from chlorophyll released from cell walls during blending. Blanching first softens those walls for greater chlorophyll release. Immediate ice water shock halts enzyme activity that would otherwise convert chlorophyll to dull olive-brown pheophytin within minutes. Refrigeration after blending preserves the colour for days.

Which herbs work best for infused oils?

Robust herbs with high chlorophyll — basil, tarragon, chives, parsley, chervil — produce the most vivid blanch-and-blend results. Woody herbs like rosemary and thyme suit slow cold or heat infusion in olive oil better, as their aromatic compounds extract differently and their fibrous structure resists blending.

How long does herb-infused oil last?

Blanch-and-blend herb oils are best used within 3–5 days refrigerated — colour and flavour both fade after 48 hours. Cold-infused oils keep for 2–3 weeks refrigerated. Discard any herb oil showing cloudiness, fermentation, or off-smell immediately.

Can you infuse oil without heat?

Yes. Cold infusion packs herbs into oil and leaves refrigerated for 24–72 hours. Flavour extraction is gentler with a more subtle aromatic profile. Cold-infused oils work best with delicate floral herbs — tarragon, chervil, bronze fennel — where heat would destroy the most volatile compounds.

What oil is best for herb infusions?

For blanch-and-blend where colour is the priority, neutral grapeseed or light sunflower oil works best — they carry chlorophyll without competing flavour. For cold infusions where the oil's character matters, mild extra-virgin olive oil adds complementary depth. Avoid strong or bitter oils that overpower delicate botanicals.

For scientific detail on fat-soluble aromatic compound extraction, Serious Eats' food science coverage of herb oils provides rigorous grounding. Explore more Soil technique writing at our experience hub, or read our post on koji fermentation and the science of enzymatic flavour.

Taste the Botanical at the Table

Every Soil menu is built around what is most alive in any given week — including the herb oils that pool beneath each course. Private dining for four to twelve guests, by enquiry.

Book Private Dining
Chef Bernice Tan, Executive Chef and founder of Soil Dining Singapore

Bernice Tan

Executive Chef · Soil Dining Singapore

Bernice's approach to food begins where most recipes end — in the question of why a technique exists, and what it asks of an ingredient. Her multiple award-winning private dining experiences span contemporary Asian and Mediterranean cuisine, composed entirely from what is most alive in any given week. At Soil, the table becomes a canvas, and the season writes the brief.

© 2026 Soil · Chef Bernice Tan · Singapore

Emulsification Sauces

Emulsification Technique: Elegant Sauce Craft | Soil Dining
Glossy golden emulsified sauce being spooned in a slow ribbon onto a dark ceramic plate, perfectly smooth and silky in texture

Cooking Technique · Soil Dining

Emulsification:
The Science of Silk

How fat and water combine to create the most luxurious textures in fine dining — and why every great sauce begins with understanding their relationship

Fat and water do not want to be together. Left alone, they separate — oil rising, water sinking, the boundary between them sharp and permanent. Emulsification is the act of persuasion: coaxing these two immiscible liquids into a stable suspension through a third ingredient that speaks both their languages. The result is one of the most transformative textures in cooking — the glossy ribbon of aioli, the trembling velvet of hollandaise, the clean silk of a perfectly mounted beurre blanc.

Key Takeaways

  • An emulsifier — lecithin in egg yolk, casein in butter, mucilage in mustard — holds fat droplets suspended in water (or vice versa)
  • Emulsions are classified as oil-in-water (mayonnaise, aioli) or water-in-oil (butter) — the ratio and order of addition determines which forms
  • Temperature is as important as technique — most emulsions break outside a narrow temperature window
  • Adding fat too quickly is the single most common cause of a broken emulsion — droplets cannot be coated before they coalesce
  • Every broken emulsion can be rescued with the right approach — knowing how to fix is as important as knowing how to build

Why Emulsification Is the Foundation of Fine Dining Sauces

Look at any fine dining sauce and you are almost certainly looking at an emulsion. The glossy pool beneath a protein course, the pale ribbon of herb-infused oil swiped across a plate, the warm golden cascade of hollandaise — all are the result of fat and water held in extraordinary intimacy by molecular persuasion. Emulsification is not a technique applied to sauces. It is the mechanism by which most sauces exist at all.

Understanding emulsification changes how a cook approaches every sauce, dressing, and finishing liquid. It replaces guesswork with cause and effect: if a sauce breaks, there is a specific reason. If a sauce will not form, there is a specific fix. At Soil Dining, emulsified sauces appear across every menu — from miso-brown butter mounts to Southeast Asian-inflected aiolis — and the technique behind each one is identical at its molecular foundation.

This post covers the science of emulsification, the most important sauce types, the variables that determine success, and the recovery techniques that every serious cook needs in their repertoire. For anyone exploring Singapore private dining at a technical level, this is the foundation beneath the surface of every plate.

Emulsion Types: A Direct Comparison

SauceTypeEmulsifierStabilityTemperature Window
MayonnaiseOil-in-waterEgg yolk lecithinPermanentStable at room temp; do not freeze
AioliOil-in-waterGarlic + egg yolk lecithinPermanentStable at room temp
HollandaiseOil-in-waterEgg yolk lecithinSemi-permanent60–70°C; breaks above 72°C
Beurre blancWater-in-fatCasein + lecithin in butterSemi-permanent60–80°C; breaks above 85°C or below 55°C
Vinaigrette (with mustard)Oil-in-waterMustard mucilageTemporaryStable for 30–60 min; re-shake to restore
XO sauceFat-continuousProteins from dried seafoodStable when warmBest served warm; fat solidifies cold

Chef's Tip

For the most stable mayonnaise base, use one egg yolk at room temperature per 200ml of oil. Begin by whisking the yolk with a teaspoon of Dijon mustard and a few drops of lemon juice before adding any oil — the mustard's mucilage and the acid both help stabilise the emulsion from the first drop. Add the first 50ml of oil in an almost invisible drizzle. Once the emulsion has formed and thickened, the remaining oil can go in more quickly.

The Four Pillars of Emulsification

1. The Emulsifier — The Molecular Bridge

An emulsifier is a molecule with a dual nature: one end is attracted to fat (lipophilic), the other to water (hydrophilic). When present, emulsifier molecules arrange themselves around fat droplets — lipophilic end inward, hydrophilic end outward — coating each droplet and preventing it from coalescing with neighbouring droplets. This microscopic architecture is what makes a sauce stable rather than separated.

The most important culinary emulsifiers are lecithin (in egg yolk — approximately 10% lecithin by weight), casein (in dairy, especially butter), mustard mucilage (in Dijon), and garlic phospholipids. Modern kitchens also use soy lecithin powder for particularly stable emulsions and xanthan gum as a stabiliser in emulsified dressings that need to hold overnight. At Soil, we keep the emulsifier as natural as possible — the egg yolk in our sauces is doing real molecular work, not decorative work.

2. Droplet Size — The Smaller the Better

Emulsion stability is directly related to droplet size. Smaller fat droplets have a larger combined surface area relative to their volume, which means more emulsifier molecules can coat them, and they are less likely to coalesce under gravity. A hand whisk produces larger droplets than an immersion blender; an immersion blender produces larger droplets than a high-speed blender. This is why machine-made mayonnaise is silkier and more stable than hand-whisked — the mechanical shear creates finer droplets that the lecithin can coat more completely.

For delicate emulsions like hollandaise, hand-whisking is preferred precisely because the larger droplets produce a less tight, more voluminous texture — lighter and more airy on the palate than the denser consistency a blender produces. The droplet size is not just a stability variable; it is a texture decision.

3. Temperature — The Narrow Window

Every emulsion has a temperature window in which it remains stable. Mayonnaise and aioli are stable at room temperature but freeze poorly — the ice crystals rupture droplets and the sauce separates on thawing. Hollandaise must be held between 60–70°C — below this the butter solidifies, above this the egg proteins coagulate, both breaking the emulsion. Beurre blanc is stable between 60–80°C — a slightly wider window, but equally unforgiving at the extremes.

The practical lesson: always monitor the temperature of warm emulsions during service. A beurre blanc sitting on a cold pass for ten minutes will break just as surely as one left over heat too long. At Soil, warm emulsified sauces are held in a bain-marie calibrated precisely to 68°C during service — the centre of the stability window for every sauce we produce.

4. Addition Rate — Patience Is Precision

The rate at which fat is added to an emulsion determines whether it forms or breaks. When oil is added too quickly to an egg yolk base, the existing emulsifier molecules cannot coat the new fat droplets before they merge with each other — the emulsion inverts or breaks entirely. The correct approach is to add fat in the smallest possible increments at the beginning, allowing each addition to be fully incorporated before the next. Once a stable emulsion has formed — visible as a thickening and lightening of the mixture — fat can be added more rapidly because the existing architecture supports new additions more efficiently.

Chef's Tip

At Soil, we build a miso-brown butter emulsion by first making beurre noisette — butter cooked until the milk solids turn golden and nutty — then whisking it into a base of white miso thinned with a splash of dashi. The miso's protein and salt content acts as an additional emulsifier alongside the butter's casein, producing a sauce that bridges Japanese and French traditions in one seamless, dark-gold ribbon. Apply warm, over binchotan-finished proteins.

"A sauce that holds is a sauce that understands its own chemistry. Emulsification is not instinct — it is physics made delicious."

Emulsification Across Culinary Traditions

France — The Architecture of Classical Sauce

French classical cuisine codified emulsification into a system. The sauces mères — mother sauces — include two emulsified preparations: sauce hollandaise and sauce mayonnaise. From these, an entire family of derivative sauces descend: béarnaise, mousseline, gribiche, aioli, rémoulade. The French contribution to emulsification is not the discovery of the technique but its codification — the recognition that understanding the science allowed infinite variation within a stable framework. This is the same logic that applies at Soil: one technique, infinite expressions.

Mediterranean and Middle Eastern — Fat as Cultural Identity

Across the Mediterranean and Middle East, emulsified preparations define entire food cultures. Lebanese toum — a white, fluffy garlic emulsion made with oil, lemon juice, and no egg — achieves stability through the phospholipids in garlic alone, whipped to extraordinary volume by mechanical action. Turkish tarator emulsifies walnuts or pine nuts with bread and lemon into a creamy, textural sauce that predates the French classical tradition by centuries. Greek skordalia — garlic and potato or bread emulsified with olive oil — is structurally identical to aioli, arrived at independently. Fat and water have been being persuaded together across the Mediterranean for millennia.

Southeast Asia and East Asia — Emulsification at Maximum Flavour

Southeast Asian and East Asian emulsified preparations operate at maximum flavour intensity. Japanese tonkatsu sauce, goma dare (sesame dressing), and wafu dressings all use emulsification to achieve their characteristic silky coating texture. Southeast Asian satay peanut sauce is a coarse emulsion of peanut fat, coconut cream, and aromatics. XO sauce — a Cantonese condiment of dried seafood, chilli, and oil — is a fat-continuous emulsion whose depth comes from the proteins released by the dried seafood acting as natural emulsifiers. At Soil, these traditions inform sauces that sit alongside or beneath European-technique preparations — the same molecular principle, a completely different cultural register.

Chef's Tip

To make toum — Lebanese garlic emulsion — without it breaking: use a food processor, not a blender. Add four large garlic cloves with half a teaspoon of salt and process to a paste. With the motor running, add 240ml neutral oil and 60ml lemon juice in very slow, alternating additions — a tablespoon of each at a time. The result is a white, fluffy, intensely garlicky emulsion that holds for a week refrigerated and transforms grilled meats, roasted vegetables, and flatbread equally.

Common Mistakes in Emulsification — and How to Fix Them

Mistake 1: Adding fat too quickly

The most common cause of broken mayonnaise, aioli, and hollandaise. Fat added faster than the emulsifier can coat new droplets causes them to merge — the emulsion inverts or separates entirely.

Fix: Begin with fat added drop by drop for the first 50ml. Once the mixture has thickened visibly and the emulsion is established, the remaining fat can go in more quickly — but never faster than a thin, steady stream.

Mistake 2: Cold ingredients for mayonnaise

Cold egg yolks and cold oil both flow less freely, making it harder to create fine droplets. The emulsifier in cold lecithin is less mobile and less effective at coating fat droplets quickly.

Fix: Bring all ingredients to room temperature before starting. This is especially critical for the oil — cold oil poured into an egg yolk base is one of the most reliable ways to break a mayonnaise.

Mistake 3: Overheating hollandaise

Above 72°C, the egg proteins in hollandaise begin to coagulate — the sauce scrambles rather than emulsifies, producing grainy curds in a pool of separated butter.

Fix: Hold hollandaise between 60–68°C. If it begins to look grainy around the edges of the bowl, remove from heat immediately and whisk in a tablespoon of cold water — this drops the temperature and may rescue the sauce before coagulation sets fully.

Mistake 4: No acid in the base

Acid — lemon juice or vinegar — lowers the pH of the water phase, which helps lecithin molecules orient more effectively at the fat-water interface. Emulsions made without acid are noticeably less stable.

Fix: Always include a small amount of acid in the water phase before adding fat. For mayonnaise, a teaspoon of lemon juice or white wine vinegar. For hollandaise, a reduction of white wine and vinegar forms the base.

Mistake 5: Not rescuing a broken emulsion correctly

A broken sauce poured into a new bowl and whisked vigorously will not re-emulsify — there is no new emulsifier present to coat the coalesced fat droplets.

Fix: Start with a fresh emulsifier base — a new egg yolk, a teaspoon of Dijon, or a tablespoon of warm water for butter sauces. Whisk the broken sauce into this fresh base in small increments, exactly as you would add fresh fat to a new emulsion.

Mistake 6: Holding beurre blanc too long off heat

Beurre blanc held below 55°C for more than a few minutes causes the butterfat to solidify and separate from the water phase — the sauce becomes greasy and broken rather than silky.

Fix: Hold beurre blanc in a bain-marie at 65–70°C during service. If it begins to look greasy, return to gentle heat and whisk in a small cube of cold butter — this re-emulsifies the sauce rapidly.

Quick Reference: Emulsified Sauces at a Glance

SauceBase EmulsifierFat RatioServe TempCommon Pairing
Mayonnaise1 egg yolk200ml oil per yolkRoom tempCold seafood, vegetables, sandwiches
Aioli1 egg yolk + garlic200ml olive oil per yolkRoom tempGrilled fish, charred vegetables, bread
Hollandaise2 egg yolks120g butter per 2 yolks65–68°CPoached fish, asparagus, eggs Benedict
Béarnaise2 egg yolks + tarragon reduction120g butter per 2 yolks65–68°CGrilled beef, lamb, roasted bone marrow
Beurre blancCasein in butter200g butter per 50ml reduction65–70°CDelicate fish, scallops, white vegetables
ToumGarlic phospholipids240ml oil per 4 cloves garlicRoom tempGrilled meats, flatbread, roasted chicken
Miso-beurre noisetteMiso protein + butter casein150g butter per 2 tbsp miso65–70°CBinchotan-finished proteins, roasted vegetables

Frequently Asked Questions

What is emulsification in cooking?

Emulsification is the process of combining two normally immiscible liquids — typically fat and water — into a stable, uniform mixture using an emulsifying agent. Emulsifiers such as lecithin in egg yolk, casein in butter, or mustard mucilage hold fat droplets suspended in water-based liquid, creating the smooth, creamy textures of sauces like aioli, hollandaise, and beurre blanc.

What is the difference between a temporary and permanent emulsion?

A temporary emulsion — like a simple vinaigrette — separates quickly after shaking because it has no emulsifying agent to hold fat droplets in suspension. A permanent emulsion — like mayonnaise — uses a true emulsifier (egg yolk lecithin) that coats fat droplets and prevents them from coalescing. Semi-permanent emulsions like hollandaise are stable at the right temperature but break easily outside it.

Why does hollandaise break and how do you fix it?

Hollandaise breaks when temperature rises above 70°C, causing egg proteins to coagulate and expel the fat. It also breaks if fat is added too quickly. To fix: whisk a fresh egg yolk with a teaspoon of warm water in a clean bowl, then slowly whisk the broken sauce into it — the fresh lecithin re-emulsifies the mixture from scratch.

What makes aioli different from mayonnaise?

Traditional Provençal aioli is an emulsion of raw garlic, olive oil, and salt — no egg. Emulsification is achieved through the natural phospholipids in garlic. Modern aioli adds egg yolk for stability. True garlic-only aioli is less stable but has a dramatically more intense, pure garlic character impossible to achieve with egg-based versions.

What is beurre blanc and how does it stay stable?

Beurre blanc is a French butter sauce made by reducing white wine and shallots, then whisking in cold butter off the heat. The casein proteins and lecithin in butter act as emulsifiers, holding butterfat in suspension in the wine reduction. Stable between 60–80°C — below 55°C the fat solidifies; above 85°C the emulsion breaks.

Can you emulsify without egg yolk?

Yes. Mustard contains mucilage that acts as an effective emulsifier. Garlic has natural emulsifying properties. Aquafaba (chickpea cooking liquid) emulsifies remarkably well through its saponin and protein content. Lecithin powder is used in professional kitchens for particularly stable emulsions without egg — useful for allergy-aware menus.

What is the role of temperature in emulsification?

Temperature affects both formation and stability. For mayonnaise and aioli, room-temperature ingredients emulsify more reliably — fat flows more freely, creating smaller droplets. For butter sauces like beurre blanc and hollandaise, precise temperature control is critical: too cold and the fat solidifies; too hot and proteins coagulate — both break the emulsion in opposite directions.

For scientific reading on lecithin and culinary emulsification, ScienceDirect's food science reference on emulsification provides peer-reviewed depth. Explore more Soil technique writing at our experience hub, or read our post on herb-infused oils — the fat extraction technique behind Soil's botanical preparations.

Taste the Architecture of Flavour

Every Soil course is built with the same rigour as its sauces — technique beneath surface, science beneath sensation. Private dining for four to twelve guests, by enquiry.

Book Private Dining
Chef Bernice Tan, Executive Chef and founder of Soil Dining Singapore

Bernice Tan

Executive Chef · Soil Dining Singapore

Bernice's approach to food begins where most recipes end — in the question of why a technique exists, and what it asks of an ingredient. Her multiple award-winning private dining experiences span contemporary Asian and Mediterranean cuisine, composed entirely from what is most alive in any given week. At Soil, the table becomes a canvas, and the season writes the brief.

© 2026 Soil · Chef Bernice Tan · Singapore

Confit Technique

Confit Technique: Oil, Fat, or Butter Method | Soil Dining
Duck leg submerged in golden fat inside a hammered copper pot, candlelight reflecting off the surface, bay leaf and thyme alongside on dark stone

Cooking Technique · Soil Dining

Confit: Oil, Fat & Butter —
The Slow Submersion

The ancient French technique of total fat immersion — and why which fat you choose changes everything about the result

A duck leg sits in a copper pot. The fat around it barely trembles — golden, translucent, holding a temperature so low it could almost be mistaken for warm rather than cooking. Yet inside that stillness, something irreversible is happening. Collagen is collapsing into gelatin. Muscle fibres are separating without contracting. In six hours, what was a tough leg will be so tender it yields at the touch of a spoon. This is confit. This is patience rewarded at its most luxurious.

Key Takeaways

  • Confit cooks ingredients fully submerged in fat at low temperature — the fat conducts heat gently and evenly while adding flavour
  • Duck fat, olive oil, and butter (beurre monté) each produce fundamentally different results — fat choice is a culinary decision, not a substitution
  • Temperature precision is critical — even 10°C above target produces dry, tough results instead of silky tenderness
  • Confit stored submerged in its cooking fat refrigerates for 4–6 weeks — it was originally a preservation technique before refrigeration existed
  • Vegetable confit in olive oil is one of the most underused and transformative techniques in any kitchen

Why Confit Produces What No Other Technique Can

The word confit comes from the French confire — to preserve. Long before refrigeration, cooks in southwest France preserved duck, goose, and pork by cooking the meat slowly in its own rendered fat, then storing it sealed beneath that fat in earthenware crocks. The discovery was accidental but the result was extraordinary: low, even heat conducted through fat produced a texture and flavour impossible to achieve through any other method.

Fat conducts heat differently from water or air. It is denser, more viscous, and distributes temperature more evenly across every surface simultaneously. At 80–90°C — far below the 100°C boiling point of water — fat gently breaks down collagen into gelatin without forcing the muscle fibres of a protein to contract and expel moisture. The result is meat that is simultaneously cooked, silky, and deeply flavoured by whatever aromatics were added to the fat.

At Soil Dining, confit is not a single technique but a family of approaches — duck fat for richness, olive oil for botanical lightness, butter for luxury and delicacy. Each serves a different purpose, and understanding which fat to reach for is the first decision of any confit preparation. For anyone exploring Singapore private dining at a technical level, confit demonstrates the profound difference between cooking an ingredient and transforming it.

Oil vs. Fat vs. Butter: A Direct Comparison

FatTemperature RangeFlavour ContributionBest ForKey Character
Duck / goose fat80–90°CRich, savoury, deeply animalDuck, pork, chicken thigh, root vegetablesTraditional, luxurious, preservation-ready
Extra-virgin olive oil70–85°CHerbaceous, fruity, grassyFish, garlic, tomato, fennel, artichokeMediterranean, lighter, botanical
Beurre monté (butter confit)55–65°CSweet dairy richness, clean fatLobster, scallop, sweetbread, delicate fishLuxury, delicate, short cook time
Neutral oil (grapeseed/sunflower)70–90°CNear-neutralWhen fat flavour should not influence resultClean canvas, aromatic-dependent
Lard80–90°CMild, clean pork richnessPork, root vegetables, beansTraditional European, deeply savoury

Chef's Tip

To make beurre monté: bring 2 tablespoons of water to a simmer in a saucepan, then whisk in cold butter cut into cubes, one at a time, over very low heat. The butter emulsifies into a glossy, stable sauce held at 80–85°C. Add the protein directly into this warm butter emulsion and cook at this temperature — for lobster, 8–12 minutes produces a texture impossible to achieve any other way.

The Four Pillars of Confit Technique

1. Temperature Precision — The Window Is Everything

Confit lives and dies by temperature. The reason it produces such extraordinary tenderness is that collagen — the connective tissue in proteins — begins converting to gelatin at around 70°C, a process that continues slowly over several hours. If the temperature rises above 90°C, the muscle fibres contract before the collagen fully dissolves, resulting in meat that is simultaneously tough and falling apart — the worst of both outcomes.

A thermometer is not optional for confit. A probe thermometer clipped to the pot, or a sous vide circulator maintaining the fat at a precise temperature, is the only reliable method. The visual cue — fat barely trembling, occasional small bubbles rising from the ingredient — is useful but imprecise. An oven set to 110°C with the pot uncovered is the most accessible home method for duck fat confit, producing a sufficiently stable temperature environment for the 6–8 hour cook time required.

2. Pre-Salt — The Cure Before the Confit

Traditional duck confit begins with a dry cure: the duck legs are rubbed generously with salt, aromatics (thyme, bay, black pepper, garlic), and sometimes sugar, then left refrigerated for 12–48 hours before the fat cook. This pre-salting serves multiple purposes. It draws surface moisture from the protein through osmosis, seasons the interior gradually rather than just the surface, and begins breaking down muscle structure — making the subsequent fat cook more efficient and the final flavour more integrated.

Skipping the cure produces confit that tastes flat despite being technically correctly cooked. The cure is where flavour is built before the fat is ever heated. At Soil, we extend this principle to vegetable confits — garlic and fennel benefit from a light salt rest of 30–60 minutes before the oil goes on.

3. Aromatic Integration — The Fat Is a Flavour Carrier

Whatever aromatics are added to the confit fat will permeate the ingredient over hours of cooking. This makes the fat a powerful flavour delivery system — but one that must be used with restraint. Thyme, bay, black pepper, and garlic are the classic additions to duck fat confit. Too many competing aromatics produce a muddy result; two or three focused additions produce deep, coherent flavour.

For olive oil confit of vegetables, the aromatic logic shifts: rosemary, dried chilli, and lemon zest suit Mediterranean preparations. For Asian applications at Soil — garlic confit for miso preparations, or ginger confit for use in broths — we use a neutral oil with aromatics that will not compete with the final dish's flavour direction. The fat is always a vehicle; it should amplify, not complicate.

4. The Finish — Confit Needs Heat to Become Complete

Confit straight from the fat is silky and flavourful but visually uninteresting — pale, soft-surfaced, without the caramelisation that makes food compelling to the eye and the palate. The finishing step is non-negotiable: a hot pan, a grill, or a pass under a salamander to crisp the surface. For duck leg confit, skin side down in a dry screaming-hot pan for 3–4 minutes produces the lacquered, crackling skin that defines the dish.

This two-step approach — low-and-slow confit followed by high-heat crisping — is the same logic as the nimono-then-binchotan technique explored in our previous post. Gentle heat establishes texture from within; intense heat creates surface drama. Together they answer the complete question of what a dish needs to be.

Chef's Tip

Garlic confit in olive oil at 80°C for 45 minutes is one of the most useful preparations any kitchen can maintain. The cloves become spreadably soft, mellow, sweet, and deeply savoury — with none of the sharpness of raw garlic. Puréed into butter, folded into aioli, or placed whole alongside braised meats, confit garlic adds a quiet, rounded depth that transforms every preparation it touches. The oil left behind is equally valuable — use it as a finishing oil for pasta, vegetables, or bread.

"Confit is not slow cooking. It is precise cooking — the controlled application of the exact temperature needed to transform collagen without losing moisture."

Confit Traditions Across Two Culinary Worlds

Southwest France — The Origin and Its Philosophy

The confit de canard of Gascony and Périgord is not merely a dish — it is a philosophy of resourcefulness. Every part of the duck was used: the fat rendered for cooking, the legs confited for preservation, the breasts served fresh, the carcass for stock. Confit emerged from the instinct to waste nothing and preserve everything. The technique's survival into fine dining reflects something true about it: that slow transformation in fat produces a result elegant enough to require no improvement, only a good pan and patience.

Mediterranean — Olive Oil as the Confit Medium

Across the Mediterranean, olive oil confit has always existed under different names. Spanish escabeche — fish preserved in acidified oil — shares the confit logic of fat as preservation and flavour medium. Italian sott'olio preparations — vegetables submerged in olive oil — are confit by another name. The Mediterranean instinct to preserve in oil reflects the same understanding as French duck fat confit: fat excludes oxygen, conducts gentle heat, and carries aromatic compounds into whatever it surrounds. At Soil, olive oil confit of fennel, artichoke, and cherry tomato bridges the French technique and Mediterranean ingredient fluently.

Japanese and Southeast Asian Fat Traditions

Japanese cuisine applies a version of confit logic through abura-daki — fish simmered in oil at low temperature — and through the use of sesame oil as a final flavour conductor rather than a cooking medium. Southeast Asian traditions of slow-cooking in coconut oil or rendered lard at low temperature produce results remarkably similar to confit: tender, fat-saturated proteins with concentrated flavour and extraordinary shelf stability when stored submerged. At Soil, coconut oil confit of chicken with galangal and lemongrass is a direct conversation between these traditions — technically French, flavourfully Southeast Asian.

Chef's Tip

Never discard confit fat. After straining out aromatics and solids, the duck fat or olive oil used for confit is now saturated with the flavour compounds released from the ingredient during cooking. Duck confit fat, used for the next batch, produces progressively deeper and more complex results over repeated uses. Olive oil from garlic confit is one of the most flavourful finishing oils in the kitchen. Store refrigerated and use within one month.

Common Mistakes in Confit — and How to Fix Them

Mistake 1: Too high a temperature

The most common confit mistake. A temperature above 90°C causes muscle fibres to contract before collagen has fully dissolved, producing meat that is simultaneously stringy and falling apart — dry inside despite being cooked in fat.

Fix: Use a thermometer. Target 80–85°C for duck fat confit. If using an oven, set it to 110°C and check the fat temperature after 30 minutes — ovens vary considerably.

Mistake 2: Skipping the pre-salt cure

Without the cure, the final confit tastes flat — the interior is technically cooked but poorly seasoned, with surface flavour only from the fat.

Fix: Salt generously with aromatics at least 12 hours before cooking. 24–48 hours produces the best flavour integration. Rinse and pat completely dry before submerging in fat.

Mistake 3: Not enough fat to fully submerge

Any surface exposed to air above the fat line will cook differently from the submerged portions — drying out and cooking faster, producing an uneven result.

Fix: Use a vessel just large enough to fit the ingredient snugly. Less space requires less fat and ensures full submersion. The ingredient should be completely covered by at least 1cm of fat above its highest point.

Mistake 4: Adding wet ingredients to hot fat

Water and hot fat react violently — spattering fat and introducing steam that disrupts the even temperature of the confit environment.

Fix: Always pat ingredients completely dry before lowering into fat. For duck, dry after the cure rinse and leave uncovered in the refrigerator for 1 hour before cooking.

Mistake 5: Finishing in a cold pan

A lukewarm pan will not crisp confit skin — it will warm and soften it further. Only a screaming-hot, completely dry pan produces the lacquered, crackling crust that confit requires.

Fix: Heat a heavy pan over maximum heat for 3–4 minutes before adding the confit, skin side down. Add no oil — the fat already present on the surface is sufficient. Do not move it for 3–4 minutes.

Mistake 6: Discarding the confit fat

The cooking fat after confit is deeply flavoured and extraordinarily useful. Discarding it is one of the most wasteful acts in the kitchen.

Fix: Strain through a fine-mesh sieve, cool, and store refrigerated. Use for the next batch of confit, for roasting potatoes, for sautéing vegetables, or as a finishing fat for sauces.

Quick Reference: Confit Temperatures & Times

IngredientFatTemperatureTimeFinish Method
Duck legDuck fat82–85°C6–8 hoursSkin down, dry hot pan, 3–4 min
Garlic clovesOlive oil80°C45–60 minServe as-is or purée into butter
Cherry tomatoOlive oil90°C90–120 minServe in oil or reduce oil as sauce
Lobster tailBeurre monté58–60°C8–12 minBrief sear, 30 sec each side
Salmon filletOlive oil50–55°C15–20 minServe immediately, no further heat
Fennel (halved)Olive oil80°C60–75 minChar cut-side in cast iron
Pork bellyLard or duck fat82°C8–10 hoursPress overnight, sear all sides

Frequently Asked Questions

What is the confit technique?

Confit is a French cooking method in which an ingredient is slowly cooked submerged in fat at a low, controlled temperature — typically between 55–90°C depending on the fat and ingredient. Fat conducts heat gently and evenly without the moisture loss or surface browning of roasting or searing, producing extraordinary tenderness and flavour.

What is the difference between confit in oil vs duck fat vs butter?

Duck fat conducts heat evenly, adds rich savouriness, and is traditional for proteins like duck and pork. Olive oil is lighter, adds herbaceous character, and suits vegetables and fish. Butter confit (beurre monté) operates at lower temperatures, adds dairy sweetness and richness, and is ideal for delicate proteins like lobster, scallop, and sweetbreads. Each fat produces a fundamentally different eating experience.

What temperature should confit be cooked at?

Duck fat confit for proteins: 80–90°C for 6–10 hours. Olive oil confit for vegetables: 70–85°C for 45–90 minutes. Butter confit for delicate seafood: 55–65°C for 8–15 minutes. Precision matters enormously — even 10°C above target can produce dry, tough results instead of the intended silky texture.

Can you confit vegetables?

Yes — and vegetable confit is one of the most underused techniques in modern kitchens. Garlic confit in olive oil at 80°C for 45 minutes produces cloves so tender they spread like butter. Tomato confit at 90°C for 2 hours concentrates flavour dramatically. Fennel, artichoke, leek, and carrot all confit beautifully in olive oil with aromatics.

How long does confit duck last?

Duck confit stored completely submerged in its cooking fat and refrigerated keeps for 4–6 weeks. The fat acts as a seal against oxygen and bacteria. Once removed from the fat, consume within 3–4 days. Confit was originally developed as a preservation technique before refrigeration — stored correctly in fat, it is remarkably long-lived.

What is beurre monté and how is it used for confit?

Beurre monté is an emulsified butter sauce made by whisking cold butter into a small amount of hot water. Held at 80–85°C, it becomes the ideal medium for confit of delicate proteins — lobster, scallop, sweetbread — cooking them gently in pure butter fat without the dairy solids burning. The result is extraordinarily rich, silky, and deeply flavoured.

Is confit the same as sous vide?

No — though both use low-temperature precision cooking. Sous vide cooks ingredients sealed in vacuum bags in a water bath, with no fat contact. Confit cooks ingredients directly submerged in fat, which flavours as it cooks. Sous vide offers more precise temperature control and no fat flavour transfer; confit offers richer flavour integration and the traditional benefit of the fat seal for preservation.

For detailed reading on collagen-to-gelatin conversion and low-temperature fat cooking, Serious Eats' food lab on low-temperature protein cooking offers rigorous scientific grounding. Explore more Soil technique writing at our experience hub, or read our post on nimono braising — the Japanese parallel to confit's patient low-heat logic.

Experience the Art of Slow at the Table

Soil's private dining menus feature confit preparations built over hours — duck, fish, vegetable — finished tableside with precision and intention. Available for intimate groups of four to twelve.

Book Private Dining
Chef Bernice Tan, Executive Chef and founder of Soil Dining Singapore

Bernice Tan

Executive Chef · Soil Dining Singapore

Bernice's approach to food begins where most recipes end — in the question of why a technique exists, and what it asks of an ingredient. Her multiple award-winning private dining experiences span contemporary Asian and Mediterranean cuisine, composed entirely from what is most alive in any given week. At Soil, the table becomes a canvas, and the season writes the brief.

© 2026 Soil · Chef Bernice Tan · Singapore

Charring Cynarin

Charring & Cynarin: Bitter Pairing Strategy | Soil Dining
A charred artichoke halved and placed on dark volcanic stone, deeply blackened outer leaves revealing pale golden interior, dramatic studio lighting

Cooking Technique · Soil Dining

Charring & Cynarin:
Bitter is Beautiful

The compound that transforms how artichoke tastes — and why controlled char turns bitterness from a flaw into the most complex flavour on the plate

There is a vegetable that makes wine taste wrong, water taste sweet, and almost every chef either fear it or fall completely in love with it. The globe artichoke carries a compound — cynarin — that rewires the palate for minutes after contact. Charred over live fire until the outer leaves are blackened and irreversible, it becomes one of the most complex single ingredients in the kitchen: bitter, sweet, smoky, mineral, and alive with a flavour that belongs to no other vegetable on earth.

Key Takeaways

  • Cynarin is the compound in artichokes that suppresses sweet receptors then causes a sweetness rebound — making water and wine taste different after eating
  • Charring drives off volatile bitter compounds while concentrating sugars — creating a sweet-bitter contrast that makes bitterness feel intentional and beautiful
  • Fat and acid are the two most effective tools for moderating bitterness — both reduce bitter compound concentration on the palate
  • Bitter vegetables — artichoke, radicchio, endive, charred brassica — pair best with high-acid, low-tannin wines and fermented, umami-rich condiments
  • The difference between charring and burning is control — intention, temperature, and timing separate the two entirely

Why Bitterness Is the Most Misunderstood Flavour in Fine Dining

Of the five basic tastes — sweet, salty, sour, umami, and bitter — bitterness is the only one that most Western kitchens are trained to minimise or eliminate. Blanching radicchio to reduce its bite. Soaking artichoke in acidulated water to mellow its cynarin edge. Cutting endive with cream or sugar to round its sharpness. The instinct is to apologise for bitterness rather than celebrate it.

Yet some of the most compelling flavour experiences in fine dining are built on bitterness — the charred exterior of a Basque-style leek, the bitter caramel of a properly darkened radicchio, the black exterior of an artichoke roasted directly on coals. Bitterness managed well does not read as harsh. It reads as depth, complexity, and contrast — the flavour that makes sweetness and richness on the same plate taste brighter than they could without it.

At Soil Dining, bitterness is a deliberate design element. Understanding cynarin — and understanding what charring does to bitter vegetables at a molecular level — is understanding why some of the most memorable courses on our menu begin with the decision to char something completely rather than protect it from the fire. Explore the full Soil private dining experience to see bitterness as a course rather than a flaw.

Bitter Vegetables Compared: Compounds, Intensity & Char Behaviour

VegetableBitter CompoundBitterness LevelChar BehaviourBest Fat Pairing
Globe artichokeCynarin, chlorogenic acidHigh, palate-alteringChar concentrates sweetness, moderates cynarinOlive oil, brown butter
RadicchioSesquiterpene lactonesMedium-highChar caramelises outer leaves, sweetens coreAged balsamic, pancetta fat
Endive (witloof)Intybin, sesquiterpene lactonesMediumChar creates dramatic contrast with pale interiorCultured butter, walnut oil
Charred brassica (broccoli, cauliflower)GlucosinolatesLow-medium when charredChar drives off sulphur compounds, sweetens dramaticallyAnchovy butter, miso
Bitter melon (ampalaya)Momordicine, charantinVery highChar only partially moderates — salting essentialFermented black bean, sesame
Dandelion leafTaraxacin, taraxacerinMediumWilts rapidly, brief char onlyWarm bacon fat, lemon

Chef's Tip

To char an artichoke correctly over binchotan: trim the outer leaves back to the pale yellow-green inner leaves, halve, and remove the choke. Brush with olive oil and place cut-side down directly over the coals for 4–5 minutes until deeply charred. Turn and cook a further 3 minutes on the rounded side. The outer layer will be blackened and the heart silky. Finish with fleur de sel, lemon, and a spoonful of confit garlic aioli — the fat and acid together tame the cynarin and make the bitterness sing rather than dominate.

The Four Pillars of Charring and Bitterness Management

1. What Cynarin Actually Does to the Palate

Cynarin — 1,3-dicaffeoylquinic acid — is a hydroxycinnamic acid found almost exclusively in globe artichokes. Its mechanism on the palate is unusual and well-documented: cynarin binds temporarily to the sweet taste receptors (TRPM5 ion channels), suppressing their sensitivity. When cynarin is washed away by saliva or liquid, those same receptors rebound — becoming briefly hypersensitive and interpreting the residual saliva as sweet. This is the origin of the well-known phenomenon of water tasting sweet after artichoke.

The wine pairing implication is significant. Wines tasted during or after cynarin exposure are often perceived as thin, metallic, or overly tannic — their natural sweetness suppressed by the cynarin effect, their tannins and acidity exaggerated by contrast. Charring reduces but does not eliminate cynarin — it remains present in the cooked flesh. Pairing artichoke with wine requires understanding this chemistry and working with it rather than against it.

2. What Charring Does to Bitter Compounds

Controlled charring achieves two simultaneous outcomes with bitter vegetables. First, intense surface heat drives off the most volatile bitter compounds — the sesquiterpene lactones in radicchio, the sulphur-containing glucosinolates in brassicas — through thermal degradation. What remains is a higher ratio of sugars and amino acids relative to bitter compounds, which reads as sweetness in the charred portions. Second, the Maillard reaction and caramelisation at the charred surface produce hundreds of new aromatic compounds — many of which are perceived as complex, savoury, and slightly sweet — that overlay and contextualise the remaining bitterness.

The result of well-executed char is a vegetable with two distinct flavour registers: the blackened exterior carrying concentrated bitterness and Maillard complexity, and the interior carrying the vegetable's natural sweetness and texture. Both are necessary. A charred radicchio served with only its charred exterior is overwhelming. Served with the pale, barely-wilted interior intact, the contrast makes both register more completely.

3. Fat as the Bitterness Moderator

Fat is the most effective practical tool for managing bitterness at the plate level. Fat molecules coat the palate and physically reduce the concentration of bitter compounds reaching taste receptors — a mechanism entirely separate from flavour. This is why a bitter vegetable dressed with olive oil, butter, or a rich emulsion tastes noticeably less harsh than the same vegetable served with water or acid alone. At Soil, every charred bitter element on the menu is paired with at least one fat-based component — whether confit garlic aioli, brown butter, or a tahini emulsion — for this precise reason.

The fat also carries aromatic compounds from any herbs or alliums added alongside, creating a flavour bridge between the bitter vegetable and the rest of the plate. A charred artichoke dressed with rosemary-infused olive oil does not just taste less bitter — the rosemary's camphor and pine aromatic compounds actively complement the artichoke's own complex bitterness, creating something that tastes complete rather than one-dimensional.

4. Acid and Fermentation as Bitter Complements

Acid — lemon juice, good vinegar, fermented liquid — works alongside fat as a bitterness moderator through a different mechanism: stimulating salivation, which washes bitter compounds from the palate more rapidly and reduces their perceived duration. Beyond the salivation effect, high-acid and fermented elements share a flavour logic with bitter vegetables — both are assertive, complex, and require something sweet or rich to contextualise them. A charred endive alongside a walnut and blue cheese salad works because the fat of the walnut, the funk of the cheese, and the acid of the dressing all address the bitterness from different directions simultaneously.

Chef's Tip

At Soil, we serve charred radicchio with a dressing of aged balsamic, miso, and toasted walnut oil — three fermented or intensely flavoured elements that meet the radicchio's bitterness as equals rather than attempting to overpower or suppress it. The miso's umami, the balsamic's sweet acid, and the walnut's fat all address different aspects of the bitterness simultaneously. The result tastes balanced not because the bitterness is reduced, but because everything around it earns its place.

"Bitterness is not a flaw to be corrected. It is the taste that makes everything else on the plate more itself."

Bitterness Across Culinary Traditions

Italy — Bitterness as Cultural Fluency

Italian cuisine has the most sophisticated relationship with bitterness of any European tradition. Radicchio di Treviso grilled over wood and dressed with olive oil and anchovy. Carciofi alla Romana — artichokes braised with mint and garlic, their bitterness softened by fat. Cicoria ripassata — bitter chicory sautéed with garlic and chilli until its harshness becomes something warm and complex. The Campari in an Aperol spritz, the amaro after dinner — Italian food and drink culture treats bitterness not as a problem but as a fundamental register of the Italian flavour palette, as essential as acidity and sweetness.

East and Southeast Asia — Bitter as Medicine, Bitter as Balance

Across East and Southeast Asian food traditions, bitterness carries meaning beyond flavour. In Chinese medicine and cooking, bitter ingredients — bitter melon, chrysanthemum greens, goji leaf — are understood as cooling, liver-supporting foods whose bitterness is their virtue rather than a flaw to be corrected. In Singapore, bitter gourd appears across Peranakan, Chinese, and Indian cooking — stir-fried with egg, braised with black bean, or stuffed and steamed. The technique in every tradition is similar: pair with salt, fat, and fermented umami-rich condiments that contextualise rather than suppress the bitterness. At Soil, this Southeast Asian comfort with bitter as an ingredient in its own right directly informs how we design courses around charred bitter vegetables.

The Mediterranean — Fire and Bitterness United

The oldest Mediterranean cooking traditions are built on fire and bitter plants. Wild greens — horta in Greek cooking, puntarelle in Roman cuisine, herbes sauvages in Provençal tradition — were gathered, sometimes blanched, always dressed with olive oil and acid. The Basque tradition of charring leeks, peppers, and artichokes directly in ash and fire does not attempt to remove bitterness — it concentrates and transforms it, relying on the char itself to create the complexity that makes the bitterness feel earned. This is the logic Soil applies: fire and bitterness as a unified design decision, not as competing forces to be reconciled.

Chef's Tip

For wine pairing alongside artichoke or cynarin-heavy dishes: reach for Vermentino from Sardinia, Grüner Veltliner from Austria, or fino Sherry. All three share high acidity, low tannin, and enough saline or mineral character to cut through cynarin's suppression effect. Avoid oaked Chardonnay, tannic reds, and anything with residual sweetness — cynarin will make them taste metallic and hollow alongside the artichoke.

Common Mistakes with Bitter Vegetables — and How to Fix Them

Mistake 1: Over-blanching to remove bitterness

Blanching radicchio or endive until the bitterness is gone also removes everything else — the texture collapses, the colour drains, and what remains is a pale, structureless leaf with no flavour at all.

Fix: Blanch for no more than 60 seconds if blanching at all. The goal is to slightly soften the structure, not eliminate the bitterness. Manage bitterness with fat and acid at the dressing stage, not at the blanching stage.

Mistake 2: Charring without fat before the heat

A dry artichoke or radicchio placed over live fire will char unevenly — the outer surface desiccates before the interior can cook, and the char is often acrid rather than complex.

Fix: Brush generously with olive oil before charring. The fat conducts heat more evenly across the surface and also begins to carry aromatic compounds into the vegetable before the Maillard reaction starts.

Mistake 3: Pairing bitter vegetables with tannic red wine

Cynarin and sesquiterpene lactones both exaggerate the perceived astringency of tannins. A bitter vegetable alongside a tannic red produces a metallic, harsh result that makes neither the food nor the wine taste good.

Fix: Pair bitter vegetables with high-acid, low-tannin whites — Vermentino, Grüner Veltliner, Chablis, fino Sherry — or serve with an acidic condiment that resets the palate between bites of food and sips of wine.

Mistake 4: Under-seasoning bitter vegetables

Salt at low concentrations neurologically suppresses bitterness perception. Under-salted bitter vegetables taste harsher than correctly seasoned ones — the bitterness dominates because there is nothing to contextualise it.

Fix: Season bitter vegetables generously. The correct salt level for a charred radicchio or artichoke is noticeably higher than for a mild vegetable — the salt is doing flavour-balancing work, not just seasoning work.

Mistake 5: Serving charred vegetables immediately without rest

Charred vegetables straight from the fire are at their most intensely bitter — the volatile compounds have not had time to settle and the char edge is at maximum intensity. A brief rest allows surface temperatures to drop and flavour to integrate.

Fix: Rest charred vegetables for 2–3 minutes before dressing and plating. Apply the acid and fat dressing during this rest — the residual heat helps the dressing penetrate the surface layers.

Mistake 6: Confusing charring with burning

A burnt vegetable has gone past the point of palatability — the Maillard reaction and caramelisation have produced only acrid, one-dimensional compounds with no sweetness left underneath. The char is not a feature but a mistake.

Fix: Charred means deliberately blackened with intact interior structure. The test: cut the vegetable open — the interior should be cooked and yielding, not raw, and the outer layer should peel away cleanly. If the interior is also carbonised, it is burnt.

Quick Reference: Bitter Vegetables, Char Approach & Pairing

VegetableChar MethodChar TimeFat PairingAcid Pairing
Globe artichoke (halved)Binchotan, cut-side down4–5 min each sideConfit garlic aioli, brown butterLemon, caperberry
Radicchio (halved)Cast iron or binchotan2–3 min cut-sideWalnut oil, aged balsamic, misoAged balsamic, sherry vinegar
Endive (halved)Cast iron, dry3–4 min cut-sideCultured butter, blue cheese dressingLemon, verjuice
Broccoli (halved head)Binchotan or oven broil5–6 minAnchovy butter, tahini, misoLemon, preserved lemon
Leek (whole, charred)Direct on coals12–15 minRomesco, confit garlic creamSherry vinegar, yuzu
Bitter melon (sliced)Cast iron, high heat2–3 min per sideSesame oil, fermented black beanRice vinegar, lime
Cardoon (blanched first)Binchotan3–4 min per sideAnchovy-butter basteLemon, white wine vinegar

Frequently Asked Questions

What is cynarin and why does it make things taste sweet?

Cynarin is a hydroxycinnamic acid found primarily in artichokes. It temporarily suppresses sweet taste receptors, then when washed away by saliva causes those receptors to rebound — interpreting the residual saliva as sweet. This is why water tastes sweet after artichoke, and why wine often tastes harsh alongside it.

What does charring do to bitter vegetables?

Charring drives off volatile bitter compounds through heat while concentrating sugars and amino acids that produce Maillard-reaction flavours. A charred artichoke or radicchio tastes simultaneously more bitter at the edges and sweeter in the interior — a contrast that makes the bitterness feel intentional and complex rather than harsh.

What wines pair well with artichoke and cynarin?

High-acid whites with low tannin and no oak work best — Vermentino, Grüner Veltliner, Muscadet, dry Sherry (fino or manzanilla), or Chablis. Avoid tannic reds, oaked whites, and sweet wines — cynarin exaggerates their flaws dramatically and makes them taste metallic or thin.

What vegetables contain cynarin besides artichoke?

Cynarin is found most abundantly in globe artichokes and cardoon. Other bitter vegetables — radicchio, endive, dandelion, bitter melon, charred brassicas — contain different bitter compounds (sesquiterpene lactones, glucosinolates) that behave differently on the palate but share the same design principle: bitterness as balance.

How do you reduce bitterness in charred vegetables?

Fat coats the palate and physically reduces bitter compound concentration reaching taste receptors. Acid stimulates salivation, washing bitter compounds away more quickly. Salt at correct levels neurologically suppresses bitterness perception. All three applied together make bitterness feel complex rather than harsh.

Is charred food safe to eat?

Controlled charring — deliberate surface blackening with intact interior — is safe and practised across professional kitchens and ancient culinary traditions globally. Concerns around acrylamide and PAHs apply to heavily burnt food consumed in high volumes, not to occasional controlled char as a fine dining flavour technique.

What is the difference between charring and burning?

Charring is controlled — deliberate surface carbonisation with a correctly cooked interior. Burning is uncontrolled — the Maillard reaction has progressed past palatability, producing only acrid compounds with no sweetness underneath. The test: cut it open. The interior should be yielding and cooked; if it is also carbonised, it is burnt, not charred.

For scientific reading on cynarin and taste receptor interaction, this NIH study on artichoke's effect on sweet taste perception provides peer-reviewed detail. Explore more Soil technique writing at our experience hub, or read our post on binchotan and live-fire finishing — the charring technique behind Soil's most dramatic courses.

Taste the Beauty of Bitter

Soil's menus are designed around contrast — bitter and sweet, charred and silky, raw and transformed. Private dining for four to twelve guests, where bitterness earns its place on every plate.

Book Private Dining
Chef Bernice Tan, Executive Chef and founder of Soil Dining Singapore

Bernice Tan

Executive Chef · Soil Dining Singapore

Bernice's approach to food begins where most recipes end — in the question of why a technique exists, and what it asks of an ingredient. Her multiple award-winning private dining experiences span contemporary Asian and Mediterranean cuisine, composed entirely from what is most alive in any given week. At Soil, the table becomes a canvas, and the season writes the brief.

© 2026 Soil · Chef Bernice Tan · Singapore

Botanical Blooming

Botanical Blooming: Herbs in Fat vs Water | Soil Dining
Two ceramic bowls side by side — herb-bloomed butter on the left, pale herb-steeped water on the right, fresh thyme between them on linen, top-down natural light

Cooking Technique · Soil Dining

Botanical Blooming:
Herbs in Fat vs Water

Why fat unlocks what water cannot — and how understanding this single principle changes every herb, spice, and aromatic preparation you make

Two bowls. In one, thyme steeped in hot water for ten minutes — pale, faintly herbal, like distant memory of the plant. In the other, the same thyme bloomed for sixty seconds in warm butter — golden, fragrant, filling the room with a depth the water could not touch. The difference is not technique. It is chemistry. Fat dissolves what water cannot reach, and understanding this changes everything about how herbs, spices, and dried botanicals should be used in the kitchen.

Key Takeaways

  • Aromatic compounds in herbs and spices are predominantly fat-soluble — fat extracts a far broader and more intense aromatic profile than water
  • Blooming in hot fat opens aromatic cell structures and drives off moisture, maximising compound release into the fat
  • Temperature determines which aromatic compounds are released — gentle fat blooming preserves the most volatile, delicate aromatics that high heat destroys
  • South Asian tarka is the most systematised application of this principle in any culinary tradition — with a sequenced spice addition that is a masterclass in aromatic extraction
  • Dried spices benefit from fat-blooming most dramatically — their aromatic compounds are locked inside and require heat and fat together to release fully

Why Fat Is a More Powerful Aromatic Solvent Than Water

The aromatic compounds responsible for the flavour and scent of herbs and spices — terpenes (the pine and citrus notes of rosemary and lemon thyme), phenols (the warm spice character of thyme and clove), aldehydes (the green, fresh notes of coriander leaf), and esters (the floral quality of basil) — are organic molecules with a fundamental chemical characteristic: they are non-polar, and dissolve preferentially in non-polar solvents.

Water is a polar solvent. Fat is non-polar. The same chemistry that makes oil and water refuse to mix also determines which aromatic compounds dissolve into each. A water-based herb infusion captures only the water-soluble fraction of a botanical's aromatic profile — a partial extraction at best. A fat-based extraction captures the full range. This is not a marginal difference. The fat-soluble fraction of most herbs represents the majority of their characteristic aroma.

At Soil Dining, blooming is the first step of almost every preparation involving dried spices and woody herbs. It is the technique that determines whether a dish smells like a great restaurant or a home kitchen — not because of equipment or ingredient quality, but because of understanding which solvent to use. This final post in our ten-part technique series brings together the botanical science behind Soil's approach to flavour at its most fundamental level.

Fat vs Water vs Alcohol: Aromatic Extraction Compared

SolventPolarityCompounds ExtractedBest ForLimitations
Fat (oil, butter, ghee)Non-polarTerpenes, phenols, fat-soluble esters, aldehydesDried spices, woody herbs, aromatics for cookingCannot extract water-soluble compounds (some minerals, certain tannins)
WaterPolarWater-soluble acids, some phenols, minerals, tanninsDelicate floral herbs for tea, light brothsMisses the majority of fat-soluble aromatic compounds
Alcohol (spirits, wine)IntermediateBoth polar and non-polar compounds — broadest extractionBitters, tinctures, liqueurs, flavour concentratesNot suitable for high-heat cooking; alcohol burns off
Acid (vinegar, citrus)PolarAnthocyanins, some pigments, water-soluble aromaticsPickles, shrubs, acid-based dressingsLimited aromatic extraction vs fat or alcohol
Ghee (clarified butter)Non-polarSame as fat — plus Maillard compounds from milk solids removedHigh-heat blooming, Indian and South Asian preparationsLoses butter's dairy sweetness — different flavour profile

Chef's Tip

For the most aromatic herb butter at Soil: bloom one sprig of fresh thyme and one of rosemary in 100g unsalted butter over the lowest possible heat for 90 seconds. Remove the herb sprigs, add a pinch of fleur de sel, and allow to cool slightly. The resulting butter carries the full fat-soluble aromatic profile of both herbs — a depth impossible to achieve by simply folding raw herbs into butter. Use to baste binchotan-finished proteins in the last 30 seconds of cooking.

The Four Pillars of Botanical Blooming

1. The Chemistry of Aromatic Release

Dried herbs and spices hold their aromatic compounds locked inside dehydrated cell structures — essential oil sacs, resin canals, and trichomes compressed and concentrated by the drying process. Two things are required to release these compounds into a dish: heat to break open the cell structures and volatilise the aromatic molecules, and a non-polar solvent (fat) to dissolve and carry them once released.

Heat alone — dry-toasting a spice in a pan — releases aromatic compounds but has nothing to carry them into the dish except the air above the pan. Most of what is released is lost to evaporation. Fat changes this entirely: the aromatic molecules dissolve into the fat immediately as they are released, preventing evaporation and carrying them throughout the dish when the fat is incorporated. The bloomed fat becomes a delivery vehicle for the herb or spice's complete aromatic profile.

2. Temperature — The Extraction Window

Temperature during blooming determines which aromatic compounds are released and which are destroyed. At 100–140°C — the correct range for dried spices — the cell structures open fully and the majority of aromatic compounds transfer into the fat efficiently. Below 80°C, extraction is incomplete. Above 160°C, the most delicate aromatic compounds — the high-volatility terpenes responsible for brightness and top-note character — begin to degrade faster than they can transfer into the fat.

For fresh herbs, the temperature window is lower: 60–80°C. Fresh herbs contain significant water, and their aromatic compounds are often more volatile and heat-sensitive than dried equivalents. Blooming fresh thyme or rosemary in warm — not hot — butter for 60–90 seconds at around 70°C captures the aromatic profile without cooking away the freshness. Blooming fresh basil or chervil at any temperature above 65°C is not recommended — their primary aromatics (linalool, estragole) degrade in seconds at higher temperatures.

3. Sequence — The Indian Tarka as Master Class

South Asian cooking has developed the most sophisticated sequenced blooming system of any culinary tradition: tarka (also called tadka or chaunk depending on region). In tarka, spices are added to hot fat in a specific order determined by each spice's aromatic compound structure and the time required for full extraction — whole spices first (mustard seeds, curry leaves, dried chilli), ground spices second (cumin, coriander, turmeric), fragrant fresh aromatics last (ginger, garlic, green chilli). Each addition is given precisely the time it needs before the next goes in.

The tarka sequence is the purest expression of botanical blooming as culinary science: an ordered, temperature-aware extraction of multiple botanical aromatics into a single fat base, each released at its optimal moment. At Soil, we apply this sequencing logic to non-Indian preparations — blooming aromatics for Mediterranean and Japanese preparations in the same ordered way, adding each element at the moment the fat is ready to receive it.

4. Fat Choice — The Carrier Shapes the Result

The fat chosen for blooming is not a neutral variable. Butter adds dairy sweetness and, when the milk solids begin to brown during blooming, Maillard complexity — a nutty, caramel undertone that wraps the herb aromatics in additional depth. Ghee has the same non-polar extraction capacity as butter without the water content or milk solids — it blooms at higher temperatures without spattering and produces a cleaner, brighter aromatic result. Neutral oil is a pure carrier — it adds nothing of its own, allowing the bloomed botanical to speak alone. Olive oil at correct temperature adds its own terpene character — grassy, peppery, fruity — which should either complement or be deliberately chosen to dialogue with the herb being bloomed.

Chef's Tip

To make a Southeast Asian-inflected bloomed fat for rice or noodle dishes: heat 3 tablespoons of neutral oil in a small pan, add 4 fresh curry leaves (they will sputter dramatically — stand back), then immediately add a small knob of grated fresh turmeric root and half a teaspoon of black mustard seeds. Bloom for 45 seconds until the mustard seeds begin to pop. Pour this bloomed oil immediately over cooked jasmine rice or noodles. The fat carries the aromatic compounds of all three botanicals directly into every grain — a technique that transforms simple staples into something aromatic and vivid.

"Fat does not just carry flavour. It unlocks it — reaching inside the herb to find what water has always left behind."

Botanical Blooming Across Culinary Traditions

South Asia — Tarka and the Architecture of Spice

Tarka is the foundation of the flavour architecture in Indian, Sri Lankan, Pakistani, and Bangladeshi cooking. The bloomed spice fat — whether ghee in North Indian preparations or coconut oil in South Indian and Sri Lankan cooking — is either the first step of a dish (spices bloomed before onion and other aromatics are added) or the final step (a finishing tarka poured over a cooked dish at the point of service, reviving and intensifying the aromatic profile). Both uses demonstrate the same understanding: fat-bloomed aromatic compounds are more powerful, more complete, and more persistent in a dish than any water-based extraction of the same spices could produce. At Soil, tarka logic informs how we open every sauce and braise that involves spice — fat first, always.

Mediterranean and Middle Eastern — Soffritto and Fat-Fried Aromatics

Mediterranean cooking achieves blooming through soffritto — the Italian base of onion, celery, and carrot cooked slowly in olive oil — and through the French matignon and North African practice of blooming cumin, coriander, and preserved lemon rind in olive oil before adding meat or vegetables. The logic is identical to tarka: aromatic compounds released into fat at the beginning of cooking permeate every element added subsequently. The fat-bloomed aromatic base is not a flavouring — it is the flavour infrastructure of the entire dish. Sofrito in Spanish cooking, mirepoix sweated in butter in French cuisine — all are expressions of the same foundational principle applied across different ingredient sets.

East Asia — Aromatics in Hot Oil as Flavour Architecture

Chinese cooking's most powerful aromatic preparations are built on fat-blooming: scallion, ginger, and garlic fried briefly in hot oil before other ingredients enter the wok; chilli doubanjiang bloomed in oil until the fat turns red and fragrant; the dried shrimp and chilli of XO sauce fried in oil until the fat absorbs every fat-soluble aromatic compound available. Japanese cooking uses a more restrained version of the same logic — kaeshi base with fat-bloomed aromatics, aburi preparations where torch flame briefly blooms surface fats. Korean cooking blooms gochugaru in sesame oil before incorporating into kimchi base and stew preparations. Across East Asia, the understanding that fat is the correct medium for aromatic extraction is as foundational as it is in South Asian tarka.

Chef's Tip

The most direct way to understand fat blooming vs water steeping in your own kitchen: steep one teaspoon of dried thyme in 100ml hot water for five minutes. Separately, bloom the same amount of dried thyme in one tablespoon of olive oil for sixty seconds over medium heat. Taste both. The water yields a faint, slightly medicinal herbal flavour. The oil yields a concentrated, rounded, complete thyme character — three to four times as intense, with aromatic compounds absent entirely from the water version. This single comparison makes the chemistry legible immediately.

Common Mistakes in Botanical Blooming — and How to Fix Them

Mistake 1: Blooming in fat that is not hot enough

Fat at room temperature or barely warm does not open the cell structures of dried herbs or spices. The aromatic compounds remain locked inside and the fat carries nothing into the dish.

Fix: For dried spices, the fat should shimmer visibly and a spice added to it should sizzle immediately. Test with a single mustard seed — it should pop within 3–4 seconds at correct temperature.

Mistake 2: Adding all spices simultaneously regardless of extraction time

Different spices require different bloom times. Whole spices need 30–60 seconds; ground spices need only 15–20 seconds. Adding both together means the ground spices burn while the whole spices are just opening.

Fix: Follow the tarka sequence — whole spices first, ground spices second, fresh aromatics last. Each addition resets the clock for the next.

Mistake 3: Over-blooming until spices burn

Aromatic compounds degrade rapidly once released into fat above optimal temperature. Over-bloomed spices produce bitter, acrid fat rather than fragrant fat — the opposite of the intended result.

Fix: Add the next ingredient (onion, stock, vegetables) the moment the spices are fragrant — do not wait. The drop in temperature from the next ingredient stops the blooming process at its optimal point.

Mistake 4: Blooming fresh delicate herbs at high temperature

Basil, chervil, tarragon, and mint lose their primary aromatic compounds within seconds above 70°C. Bloomed at high heat, they produce flat, cooked-herb flavour rather than the fresh brightness they are valued for.

Fix: Bloom delicate fresh herbs at 60–70°C maximum. Or skip the bloom entirely — add them raw at the end of cooking, or blend into cold fat for a compound butter instead.

Mistake 5: Using too much fat for the quantity of herb or spice

Aromatic compounds released during blooming dilute into whatever volume of fat is present. Too much fat produces a weakly flavoured aromatic oil; the right amount produces an intensely fragrant one.

Fix: Use the minimum fat needed — 1 tablespoon per teaspoon of dried spice or 2–3 sprigs of fresh woody herb. Scale up proportionally. The fat should smell intensely of the herb within 30 seconds; if it does not, the ratio is wrong.

Mistake 6: Steeping herbs in water and expecting the same result as fat blooming

The single most common misunderstanding about herb flavour extraction. Water-based herb infusions — no matter how long — cannot produce the aromatic intensity of fat-based extraction because the chemistry is fundamentally incompatible.

Fix: Use water steeping for the specific water-soluble compounds it extracts well — light floral teas, delicate colour infusions. For cooking aromatics intended to flavour oil-based dishes, always bloom in fat. The two techniques answer different questions.

Quick Reference: Botanical Blooming Guide

BotanicalBest FatBloom TempBloom TimeApplication
Cumin (whole)Ghee or neutral oil140°C30–45 secDal, rice, roasted vegetables
Curry leaves (fresh)Coconut oil or neutral oil160°C15–20 sec (spatters)South Indian finishing, rice, noodles
Dried chilli flakesOlive oil or neutral oil120°C20–30 secPasta, braised vegetables, finishing oil
Rosemary (fresh)Butter or olive oil70–80°C60–90 secBasting fat for proteins, compound butter
Thyme (fresh)Butter or ghee70°C60–90 secBeurre monté, basting, finishing sauces
Cardamom (whole, cracked)Ghee or butter130°C20–30 secRice, desserts, spiced butters
Turmeric (fresh grated)Neutral oil100°C30 secRice, noodles, finishing oil, compound butter

Frequently Asked Questions

What is blooming in cooking?

Blooming is the technique of briefly heating herbs, spices, or dried botanicals in fat before adding other ingredients. Heat and fat together open aromatic cell structures and release fat-soluble aromatic compounds far more completely than water or dry heat alone. The fat then carries these compounds throughout the dish.

Why do herbs release more flavour in fat than in water?

The primary aromatic compounds in herbs and spices — terpenes, phenols, aldehydes, and esters — are predominantly fat-soluble. Water extracts only the water-soluble fraction of a herb's aromatic profile. Fat dissolves and carries the full range, producing an extraction that is broader, more intense, and more complete than any water-based method.

What temperature should you bloom herbs in fat?

For dried herbs and spices, bloom at 100–140°C — hot enough to open aromatic cell structures. For fresh herbs, bloom at lower temperatures (60–80°C) to avoid destroying the most volatile aromatic compounds. Delicate herbs like basil and chervil should not be bloomed at all — add them raw at the end of cooking instead.

What is the difference between blooming in oil vs butter?

Blooming in neutral oil produces a clean aromatic extraction where the herb or spice flavour dominates. Blooming in butter adds dairy sweetness and, when milk solids begin to brown, Maillard complexity — a nutty undertone that wraps the herb aromatics in additional depth. Ghee sits between the two: butter's richness and higher smoke point without the water content.

Can you bloom fresh herbs in fat?

Yes, but with care. Fresh herbs contain significant water (causing spattering in hot fat) and delicate volatile compounds that degrade quickly above 70–80°C. Bloom fresh woody herbs in warm rather than hot fat for 30–90 seconds. Delicate herbs like basil, tarragon, and chervil are better added raw or blended into cold fat as compound butter.

What herbs and spices benefit most from fat blooming?

Dried spices benefit most dramatically — cumin, coriander, cardamom, fenugreek, dried chilli, curry leaves, mustard seeds, and turmeric all release significantly more aroma when bloomed in fat. Woody fresh herbs — thyme, rosemary, bay, sage — also benefit. Delicate fresh herbs are better added raw to preserve their most volatile aromatics.

Is blooming the same as tempering in Indian cooking?

Yes — tarka (also called tadka or chaunk) is the original, most systematised application of the blooming principle. Whole and ground spices are added to hot fat in a specific sequence based on each spice's extraction time. The resulting fragrant fat is either the base of the dish or poured over it as a finishing step — one of the most sophisticated aromatic extraction techniques in any culinary tradition.

For scientific reading on terpene solubility and fat-based aromatic extraction, Serious Eats' food science coverage of spice chemistry provides accessible and rigorous grounding. Explore the full Soil technique series at our experience hub, or read our post on herb-infused oils — the cold-extraction companion technique to fat blooming.

Taste the Science of Aroma

Every Soil menu is built from the same understanding — that technique is not decoration but the foundation of every flavour that reaches the table. Private dining for four to twelve guests, by enquiry.

Book Private Dining
Chef Bernice Tan, Executive Chef and founder of Soil Dining Singapore

Bernice Tan

Executive Chef · Soil Dining Singapore

Bernice's approach to food begins where most recipes end — in the question of why a technique exists, and what it asks of an ingredient. Her multiple award-winning private dining experiences span contemporary Asian and Mediterranean cuisine, composed entirely from what is most alive in any given week. At Soil, the table becomes a canvas, and the season writes the brief.

© 2026 Soil · Chef Bernice Tan · Singapore

Binchotan & Live-Fire

Binchotan Charcoal & Live-Fire Finishing Art | Soil Dining
Large scallop searing over glowing binchotan charcoal on a Japanese konro grill, caramelised crust with thin wisp of smoke rising

Cooking Technique · Soil Dining

Binchotan & Live-Fire Finishing:
Where Charcoal Becomes Flavour

The Japanese art of white charcoal, and why fine dining turns to fire for its most memorable moments

There is a moment just before a piece of food touches hot binchotan when the air changes. Something ancient and alive. A radiant pulse of heat rises from white charcoal so dense and clean it barely smokes — only glows. This is not barbecue as most people know it. It is precision made elemental, flavour written in mineral and fire.

Key Takeaways

  • Binchotan burns hotter and cleaner than standard charcoal, adding mineral character without smoke interference
  • Live-fire finishing separates internal texture from surface flavour — the key to restaurant-quality results
  • Both Asian (robatayaki, satay, wok hei) and Mediterranean (Basque wood-fire, Turkish mangal) traditions share the same elemental fire logic
  • Far-infrared radiation from binchotan cooks from within — a fundamentally different heat profile to gas or electric
  • Most live-fire mistakes happen before the food touches heat, not during cooking

Why Charcoal Sits at the Heart of Contemporary Fine Dining

Search for binchotan charcoal cooking in Singapore and you will find it at some of the most decorated tables in the city — private dining experiences where every detail is deliberate, every temperature considered. That is not a coincidence. Binchotan, Japan's renowned white charcoal, has earned its place in modern kitchens not through trend, but through irreplaceable results.

This post is for anyone who wants to understand what live-fire finishing actually does to food — and why it produces flavours that no oven, pan, or torch can fully replicate. We cover the science, the craft, the cultural context, and the practical techniques for bringing this approach to your own cooking.

At Soil Dining, live-fire sits at the intersection of two culinary worlds drawn from equally: the precision of Japanese fire craft and the bold, flame-forward confidence of Mediterranean cooking. Understanding both traditions is the key to using fire intelligently.

Binchotan vs. Standard Charcoal vs. Gas: A Direct Comparison

PropertyBinchotan (White Charcoal)Lump CharcoalGas / Electric
Burn temperature800–900°C sustained600–750°C, variable300–500°C, controlled
Smoke outputMinimal to noneModerate to highNone
Heat typeFar-infrared radiantConvective + radiantConvective / contact
Flavour contributionClean mineral, subtle charSmoky, sometimes acridNeutral
Burn duration3–5 hours1–2 hoursContinuous (energy cost)
Fine dining suitabilityPreferred in Japanese & top-tier kitchensBBQ, casual grillingBulk cooking, base prep
Home accessibilityAvailable, requires konro grillWidely availableStandard household

Chef's Tip

Light binchotan outdoors over a gas flame or in a chimney starter — never with lighter fluid. It takes 20–30 minutes to reach full temperature. Patience here is not optional. Rushing produces a bitter, chemical-laced cook that defeats the entire purpose of the charcoal.

The Four Pillars of Live-Fire Finishing

1. Far-Infrared Radiation — Heat That Cooks From Within

What separates binchotan from almost every other heat source is its emission profile. Standard charcoal, gas, and electric all cook primarily through convection and surface contact. Binchotan emits far-infrared radiation — a wavelength of heat that penetrates the surface of food and warms it from the inside out simultaneously.

The practical result: proteins cook more evenly, moisture is retained longer, and the surface achieves intense Maillard browning without the interior overcooking. A scallop finished over binchotan for 90 seconds has a fundamentally different texture from one seared in a pan — the interior stays glassy and barely set while the exterior caramelises into something amber and deeply flavoured.

2. The Maillard Reaction at Extreme Heat

The Maillard reaction — the chemical process that creates browning, crust, and hundreds of new aromatic compounds — accelerates rapidly above 150°C and reaches peak complexity at temperatures binchotan provides easily. Flavours that would take minutes of pan-searing are created in seconds over live charcoal.

Live fire also introduces a variable no other heat source can — terroir. Binchotan made from ubame oak carries mineral characteristics from the wood itself. Hay-smoked finishes introduce phenolic compounds. Mangrove charcoal, used across Southeast Asia, produces a subtly sweet, earthy finish. The charcoal is not neutral; it is an ingredient.

3. The Finishing Principle — Two Tasks, Two Tools

The most important conceptual shift in live-fire cooking at the fine dining level is understanding it as a finishing technique, not a primary cooking method. The interior of a protein is established through gentle heat — sous vide, low oven, or careful basting. The exterior — its crust, colour, aromatic complexity — is then created in seconds over fire.

A duck breast cooked sous vide to exactly 57°C, then finished over binchotan for 90 seconds per side, has a precision of texture and depth of exterior flavour that simultaneous cooking can never match. Separating these two tasks produces results impossible to achieve any other way.

4. Rest, Then Fire — The Correct Sequence

Proteins must be dry-surface before they touch live fire. Any residual moisture will steam before it chars, preventing Maillard browning and producing a grey, steamed exterior. Pat dry, then rest uncovered in the fridge for at least 30 minutes before grilling. This single step separates home cooking results from professional ones more than any other.

Chef's Tip

For vegetables, the opposite applies: high moisture in eggplant, leek, and corn is an asset. Place directly over the hottest part of the binchotan and let the outer layer char completely — this steam-roasts the interior while creating a blistered, smoky skin that peels away to reveal silky, concentrated flesh beneath.

"Fire does not just cook food. It writes flavour — in charcoal, mineral, and the Maillard chemistry that no other heat source replicates."

Regional Fire Philosophies Worth Stealing

Japanese Robatayaki — Patience and Proximity

Robatayaki — literally "fireside cooking" — is the Japanese tradition of grilling over bincho charcoal at a careful distance from the heat. Ingredients are placed on long wooden paddles and held near, not on, the charcoal. The result is slow, even caramelisation without flare-up or scorching. Chefs monitor colour, not time — responding to what the ingredient tells you, not to a timer.

Basque and Turkish Fire Craft — The Mediterranean Approach

In the Basque Country, entire tasting menus are cooked over wood embers — not just meat, but fish, vegetables, and desserts. The philosophy is restraint and confidence: great ingredients need fire and salt, and little else. Turkish mangal grilling shares this directness. The flavour logic of Mediterranean fire cooking has always been additive rather than transformative — fire amplifies; it does not obscure.

Southeast Asian Charcoal Logic — Satay to Wok Hei

Across Southeast Asia, charcoal heat defines entire flavour categories. Satay over coconut husk charcoal creates a particular caramelised crust different from any other grilled meat — the quick flare from dripping fat, the high heat, the sweet marinade. Wok hei, the smoky, slightly scorched character of Chinese stir-frying over extreme heat, is live-fire cooking applied to a different vessel. Both share the same logic: fire at high intensity, applied briefly, to create irreproducible flavour.

Chef's Tip

To bridge both worlds at Soil, I finish Mediterranean vegetables — grilled artichoke, charred leek — with a miso-brown butter baste in the final 30 seconds over charcoal. The umami depth of the miso caramelises into the blistered surface, creating something that belongs to neither tradition and both at once.

Common Mistakes in Live-Fire Cooking — and How to Fix Them

Mistake 1: Starting with an under-temperature grill

Binchotan needs 20–30 minutes to reach full temperature. Food placed on under-temperature charcoal steams rather than caramelises.

Fix: Hold your palm 10cm above the grate. You should last no more than 2 seconds at correct cooking temperature.

Mistake 2: Wet protein surfaces

Moisture on the surface of fish, meat, or tofu prevents the Maillard reaction from beginning — heat evaporates water before browning can occur.

Fix: Pat dry with paper towel, then rest uncovered in the fridge for at least 30 minutes before grilling.

Mistake 3: Constant moving and turning

Every time food is moved, the crust forming underneath is interrupted. The Maillard reaction needs sustained contact at high temperature.

Fix: Place food and leave it. Turn only once, when colour appears on the sides.

Mistake 4: Over-marinating before fire

Sugar-heavy marinades char immediately over binchotan, creating bitterness before the interior cooks. Acidic marinades break down protein surfaces, causing steaming rather than searing.

Fix: Pat off excess marinade before grilling. Apply sweet glazes only in the final 60–90 seconds.

Mistake 5: Skipping the rest after fire

Proteins taken directly from intense heat to the plate continue carryover cooking and lose moisture rapidly when cut.

Fix: Rest on a wire rack for 3–5 minutes after finishing. The crust firms; the interior stabilises.

Mistake 6: Using binchotan indoors without ventilation

Even low-smoke charcoal produces carbon monoxide. Indoor use without proper ventilation is dangerous regardless of charcoal type.

Fix: Use outdoors, or with a certified kitchen ventilation system rated for live-fire cooking.

Quick Reference: Live-Fire Timing & Temperature Guide

IngredientGrill DistanceApprox. TimeTarget Finish
Scallop (large)Direct, 5cm from coals60–90 sec each sideDeep amber crust, glassy interior
Duck breast (pre-cooked 57°C SV)Direct, skin side down90 sec skin / 30 sec fleshLacquered, crisp skin
King oyster mushroomDirect, 8cm4–5 min, turning twiceGolden, slightly charred edges
Whole eggplantDirect on coals12–18 minFully collapsed, smoky interior
Leek (halved)Direct, 6cm6–8 min per sideCharred exterior, silky interior
Mackerel filletDirect, skin up first3 min flesh / 90 sec skinBlistered skin, moist flesh
Corn (husk on)Direct on coals15–20 minSteamed interior, sweet char notes

Frequently Asked Questions

What is binchotan charcoal?

Binchotan is a Japanese white charcoal made from ubame oak, prized for burning at steady high heat with almost no smoke. It produces far-infrared radiation that cooks ingredients from within, creating an exceptionally clean, mineral-kissed char used in professional kitchens for centuries.

How is binchotan different from regular charcoal?

Regular lump charcoal produces visible smoke and fluctuating heat, imparting a sometimes harsh flavour. Binchotan burns at a consistent 800–900°C with almost no smoke, letting the ingredient's own flavour — and the subtle minerals of the charcoal — define the dish.

What foods work best with live-fire finishing?

Proteins with fat — wagyu, duck breast, fatty fish like mackerel — caramelise beautifully under direct binchotan heat. Vegetables with high moisture — eggplant, leek, corn, king oyster mushroom — transform dramatically, their sugars concentrating and outer layers charring into smoke-perfumed skins.

Can I replicate binchotan results at home?

Yes, with adaptation. A cast-iron skillet at very high temperature or a kitchen blowtorch after pan-searing approximates the Maillard browning. For actual binchotan, Japanese import stores in Singapore stock portable konro grills and charcoal. Always use in a well-ventilated space.

Why do chefs finish dishes over charcoal rather than cook entirely on the grill?

Finishing preserves precise internal temperatures achieved through sous vide or gentle oven cooking, while adding the caramelised exterior only high direct heat provides. It separates two fundamental tasks — internal texture and surface flavour — and executes each perfectly.

How does live-fire connect Asian and Mediterranean cuisines?

Fire belongs equally to both traditions. Japanese robatayaki, Southeast Asian satay, and wok hei share the same logic as Basque wood-fired hearths, Turkish mangal, and Greek souvlaki — direct flame or radiant charcoal heat building flavour through the Maillard reaction, the common language of fire across cultures.

What is wok hei and how does it relate to live-fire cooking?

Wok hei — breath of the wok — is the smoky, slightly charred flavour created when a carbon-steel wok reaches temperatures that briefly ignite vaporised oil. It is live-fire applied to a different vessel: extreme heat, applied briefly, to create irreproducible flavour that home cooks can approximate with a carbon-steel pan on maximum heat.

For further reading on charcoal combustion and far-infrared heat in cooking, Serious Eats' food science library offers detailed scientific explanations. Explore more Soil technique writing at our experience hub, or read our companion post on koji fermentation and the art of time as flavour.

Experience Fire at the Table

Soil's private dining menus bring live-fire finishing tableside — binchotan stations, charcoal-kissed courses, and the full drama of fire as a culinary act. Available for intimate groups of four to twelve.

Book Private Dining
Chef Bernice Tan, Executive Chef and founder of Soil Dining Singapore

Bernice Tan

Executive Chef · Soil Dining Singapore

Bernice's approach to food begins where most recipes end — in the question of why a technique exists, and what it asks of an ingredient. Her multiple award-winning private dining experiences span contemporary Asian and Mediterranean cuisine, composed entirely from what is most alive in any given week. At Soil, the table becomes a canvas, and the season writes the brief.

© 2026 Soil · Chef Bernice Tan · Singapore